

A focused, usage-based preventive maintenance programme — daily operator checks plus scheduled weekly, monthly and annual technician tasks — is the fastest way to stop precision drift and unplanned CNC downtime. Start today with three actions: walk the machine and look for leaks or damaged cables, check coolant sump level and concentration with a refractometer, and clear chips from way covers before the first cut. Those three steps take under five minutes and prevent the majority of shift-level failures.
TL;DR checklist — before first part each shift:
- Visual walk-around for leaks, loose guards, damaged cables (2–3 min)
- Coolant level and concentration check; auto-lube reservoir level (3–5 min)
- Clear chips from way covers and chip conveyor; wipe exposed ways with an oil-dampened cloth (3–5 min)
- Spindle warm-up at graduated speeds (10–20 min, runs concurrently with other checks)
- Emergency stop test and control cabinet air intake quick check (1–2 min)
Daily operator checks take roughly 10–30 minutes per machine and prevent most preventable failures when done consistently.
Pro Tip: Review your PM schedule quarterly during the first year. Adjust task frequencies using actual runtime data and the failure modes you observe — not just the OEM timetable.

Table of Contents
- Why preventive maintenance is the best investment a CNC shop can make
- Daily operator checks: a brief routine that protects accuracy every shift
- Weekly and monthly tasks for maintenance technicians
- Quarterly and annual specialist tasks: calibration, vibration analysis and when to call for service
- Lubrication, coolant management and spindle health: the three areas that cause the most precision loss
- How to build a usage-based, adjustable PM schedule
- Record-keeping, reporting channels and spare-parts strategy
- Condition monitoring: the data your PM programme should be collecting
- How an Anderson-recommended PM programme works
- Key takeaways
- Moving a shop from break-fix to a preventive maintenance culture
- Anderson Group Australia: PM setup, service contracts and spare-parts kits
- Further reading and useful references
Why preventive maintenance is the best investment a CNC shop can make
The business case for CNC machine maintenance is straightforward once you look at the numbers on the other side of the ledger. A structured preventive maintenance programme prevents many unplanned CNC breakdowns and can significantly extend equipment lifespan. An unplanned spindle failure alone costs substantial hourly lost production and tens of thousands of dollars in repair or replacement. Planned bearing replacement is considerably less expensive and involves fewer labor hours.
The failure modes that cause that kind of damage rarely arrive without warning. Spindle bearings degrade gradually. Coolant becomes contaminated over weeks. Ballscrew backlash increases by microns per shift. None of these announce themselves with an alarm until the part is already scrap or the bearing has seized. A PM programme intercepts them while they are still cheap to fix.
Beyond repair costs, the business benefits stack up quickly:
- Higher uptime and predictable scheduling — customers get deliveries on time
- Maintained repeatability — tolerances stay where they were set at commissioning
- Lower mean repair cost — small interventions replace large emergency ones
- Extended machine life — well-maintained CNC machines commonly produce near-factory tolerances for 15–20 years; neglected machines often need major repairs within 5–8 years
PM is also a data-collection activity. Every measurement you log — runout, backlash, coolant pH, spindle temperature — builds a machine health history that speeds diagnosis when something does go wrong and satisfies quality audit requirements under ISO 9001 or AS9100.
Daily operator checks: a brief routine that protects accuracy every shift
These checks happen before the first part runs. They are the operator’s responsibility and take 10–30 minutes total, most of which overlaps with the spindle warm-up.
Start-of-shift walk-around (2–3 minutes)
Walk the perimeter of the machine and look for:
- Fluid puddles or drips under the machine or on way covers
- Damaged or kinked cables, hoses, or lube lines
- Loose or missing guards and enclosure panels
- Any tooling left in the spindle or on the table from the previous shift
If you find a leak or damaged component, log it immediately and notify the shift lead before running. Do not mask a leak with a rag and continue.
Coolant and lubrication checks (3–5 minutes)
Check the coolant sump level visually and verify concentration with a refractometer — most water-soluble coolants run at 6–10% concentration, but always confirm against the manufacturer’s specification for your fluid. Check the auto-lube reservoir level and confirm the lube cycle indicator has cycled since power-up. If the machine has a manual lube point, apply it now.
Coolant that smells rancid or looks brown or dark is already contaminated. Log it and flag for a tramp oil skim or full change — do not wait for the weekly check.
Chip handling and way wiping (3–5 minutes)
Clear chips from way covers, the chip conveyor, and the spindle nose area. Fine swarf bypasses way wipers in high-production environments. Wipe way surfaces with an oil-dampened cloth to remove abrasive slurry that accelerates wear even when automatic lubrication appears normal. Never use compressed air to blow chips off way surfaces — it drives abrasive particles into bearing surfaces and seals.
Spindle warm-up (10–20 minutes, concurrent)
A cold spindle has different dimensions to a warm one. Run a graduated warm-up cycle — typically starting at 20–30% of maximum RPM and stepping up every few minutes — for 10–20 minutes before any tight-tolerance cuts. This is referenced in ISO 230-3 and standard machining handbooks as a requirement for dimensional stability. Listen during warm-up: grinding, whining, or clicking warrants an immediate stop and inspection.
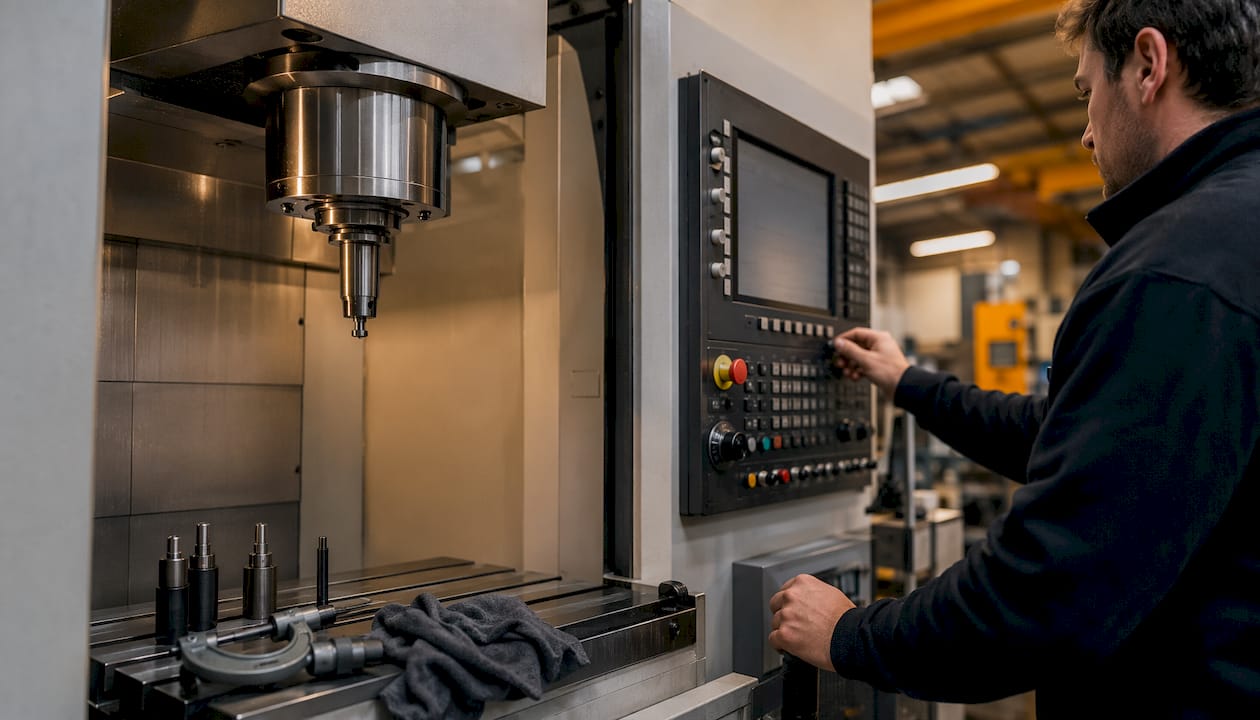
Control cabinet and safety checks (1–2 minutes)
Glance at the control cabinet air intake filter — if it looks grey and clogged, flag it for cleaning. Clogged control cabinet filters raise internal temperatures and shorten drive component life. Test the emergency stop button and confirm the door interlock is functioning before production begins.
Pro Tip: Give operators a simple one-line logging template for “odd noises” or unusual feel: machine ID, time, description, and who was notified. Treat any logged anomaly as a stop-and-inspect trigger, not a watch-and-see.
Weekly and monthly tasks for maintenance technicians
These go deeper than operator checks and require someone with technical knowledge of the machine. Schedule them during planned downtime windows and log every result in your CMMS.
Weekly tasks (30 minutes)
- Manually cycle the lube system and verify oil film at distribution endpoints — not just reservoir level
- Skim tramp oil from the coolant sump with a skimmer or absorbent roll
- Check and clean coolant nozzles; blocked nozzles cause localised heat and poor surface finish
- Inspect and vacuum control cabinet air filters; replace if airflow is restricted
- Check chip conveyor operation and clean the sump of settled swarf
- Verify coolant concentration with a refractometer and log the reading
- Inspect all axis drive belts for tension and visible wear
Monthly tasks (1–2 hours)
Monthly work is where you catch medium-term drift before it affects parts. Key tasks:
- Spindle runout check: use a test bar and dial indicator in the spindle taper. Acceptable runout for most machining centres is under 5 µm at the gauge line; check your OEM specification. Log the reading against your baseline.
- Machine levelling: check with a precision level. Machines settle over time, especially after floor vibration or nearby heavy equipment movement.
- Ballscrew and axis backlash inspection: run a dial indicator against a fixed reference and command small axis moves. Log the backlash value. Monthly axis positioning checks compared to baseline values reveal gradually deteriorating components before part quality is affected.
- Filter replacement: replace coolant tank filters and clean or replace electrical cabinet filters.
- Coolant testing: test pH (target range 8.5–9.5 for most metalworking fluids), check for bacterial growth by smell and colour, and perform a partial coolant change if indicated.
- Hydraulic fluid condition: check colour, clarity, and level. Milky hydraulic fluid indicates water contamination.
Role assignment table:
| Task | Operator | Maintenance technician |
|---|---|---|
| Daily visual walk-around | ✓ | |
| Coolant and lube level check | ✓ | |
| Chip clearing and way wiping | ✓ | |
| Weekly lube system cycle verification | ✓ | |
| Weekly filter inspection and cleaning | ✓ | |
| Monthly spindle runout measurement | ✓ | |
| Monthly backlash check | ✓ | |
| Monthly coolant pH test and change | ✓ | |
| Machine levelling | ✓ |
Pro Tip: Schedule monthly tasks to coincide with a planned production gap — even a two-hour window at the end of a Friday shift. Tasks done under time pressure get skipped or done poorly.
Quarterly and annual specialist tasks: calibration, vibration analysis and when to call for service
This is where PM transitions from maintenance into precision assurance. These tasks require specialist instruments and, in some cases, manufacturer-certified technicians.
Quarterly tasks (2–4 hours)
- Vibration analysis: use an accelerometer on the spindle housing at multiple speeds. Compare to your baseline measurement taken when the machine was new or last serviced. Rising vibration amplitude at bearing defect frequencies indicates inner race, outer race, or rolling element wear.
- Backlash and compensation trend check: compare current backlash readings to the monthly log. A consistent upward trend across three or four readings is a reliable indicator of ballscrew or nut wear.
- Thermal imaging: scan bearings, motors, and drive components with a thermal camera. Hot spots that were not present in the previous quarter’s scan indicate developing faults.
- Dimensional accuracy test: machine a known geometry and measure against specification. This is the ground truth for whether your machine is holding tolerance.
- Way cover inspection: check for damage, tears, or restricted movement. Damaged way covers allow chips and coolant to reach the guideways directly.
- Control system diagnostics: run the full self-test sequence and review alarm history for recurring codes.
Annual tasks (1–3 days, qualified technician)
- Full geometric calibration using a laser tracker or ballbar — checks squareness, straightness, and backlash compensation across all axes
- Hydraulic fluid replacement (full drain and refill)
- Spindle bearing condition assessment; replace if hours or vibration trending indicates degradation
- Full coolant system flush and recharge
- Belt replacement on all drive systems regardless of apparent condition
- Seal inspection and replacement on all axes
- Control software backup and update
- Way oil filter replacement
When to escalate to manufacturer service: rising spindle runout that exceeds 8–10 µm at the gauge line, backlash that has increased more than 50% above the commissioning baseline, or thermal imaging that shows a bearing running more than 20°C above the surrounding structure. Do not attempt spindle bearing replacement without OEM training — a failed spindle rebuild can cost more than the original repair.
Pro Tip: Run geometric calibration checks at operating temperature, after a full warm-up cycle. A cold machine will give you different numbers to a warm one, and your parts are always made warm. Keep a cumulative log so you can see the trend across years, not just the last reading.
Lubrication, coolant management and spindle health: the three areas that cause the most precision loss
These three areas account for the majority of premature wear and accuracy loss in CNC machines. Get them right and most other PM tasks become easier.
Lubrication
Always use OEM-specified oil grades. Mixing oils — even oils of the same viscosity from different manufacturers — can cause additive incompatibility and accelerate wear. Slideway oil and spindle oil are different products; never substitute one for the other.
Reservoir top-ups happen daily or weekly depending on consumption. Full oil changes for gearboxes and hydraulic systems typically occur at regular intervals based on usage hours or time, depending on the machine’s requirements. Validate auto-lube delivery by checking for an oil film at the distribution endpoints — way surfaces and ballscrew nuts — not just by confirming the reservoir level has dropped.
Dos and don’ts:
- ✓ Use the grade specified in the machine manual
- ✓ Check lube delivery at the endpoint, not just the reservoir
- ✓ Log oil consumption weekly — a sudden increase signals a leak
- ✗ Never mix oils from different manufacturers or grades
- ✗ Never use compressed air to clean lube system components
- ✗ Never overfill reservoirs past the MAX line
Coolant management
Coolant pH typically sits between 8.5 and 9.5 for most metalworking applications; below 8.0 indicates bacterial growth or acid contamination requiring biocide treatment or a full change. Tramp oil should be skimmed weekly. A rancid smell, brown colour, or pH below 7.5 means the coolant needs replacing regardless of concentration.
Full tank drain and clean should happen at the six-month or 1,000-hour service interval, or sooner if contamination indicators appear. When you drain, remove all settled chips and sludge from the tank bottom before recharging. Dispose of used coolant in accordance with your state environmental regulations.
Spindle health
Normal spindle bearing temperature after sufficient operating time is typically within a moderate range measured at the bearing housing. Readings significantly above the normal operating temperature indicate a warning and warrant investigation. Measure daily with an infrared thermometer and log the reading. Temperature trending over three to six months reveals bearing degradation weeks before catastrophic failure.
Runout should be checked monthly with a test bar. Increasing runout alongside rising vibration is a reliable combined indicator of bearing wear. Proper warm-up, clean coolant, and correct lubrication all extend bearing life significantly.
Pro Tip: Validate auto-lube delivery by checking the oil film at distribution endpoints — ballscrew nuts and guideway surfaces — not just by confirming the reservoir level has dropped. A blocked distribution line can starve a critical surface while the reservoir reads normal.
How to build a usage-based, adjustable PM schedule
A calendar-based schedule works for a machine running a single shift, five days a week. For anything running two or three shifts, or processing abrasive materials, calendar intervals will leave you either over-maintaining some tasks or under-maintaining others. Hours-based scheduling solves this.
Why hours-based intervals work better
Certain checks should be performed more frequently on machines with higher shift utilisation. A machine running 16 hours a day accumulates 500 hours in about a month; the same machine on a single shift takes two months. If your coolant change interval is 500 hours, the two-shift machine needs it monthly, not every two months.
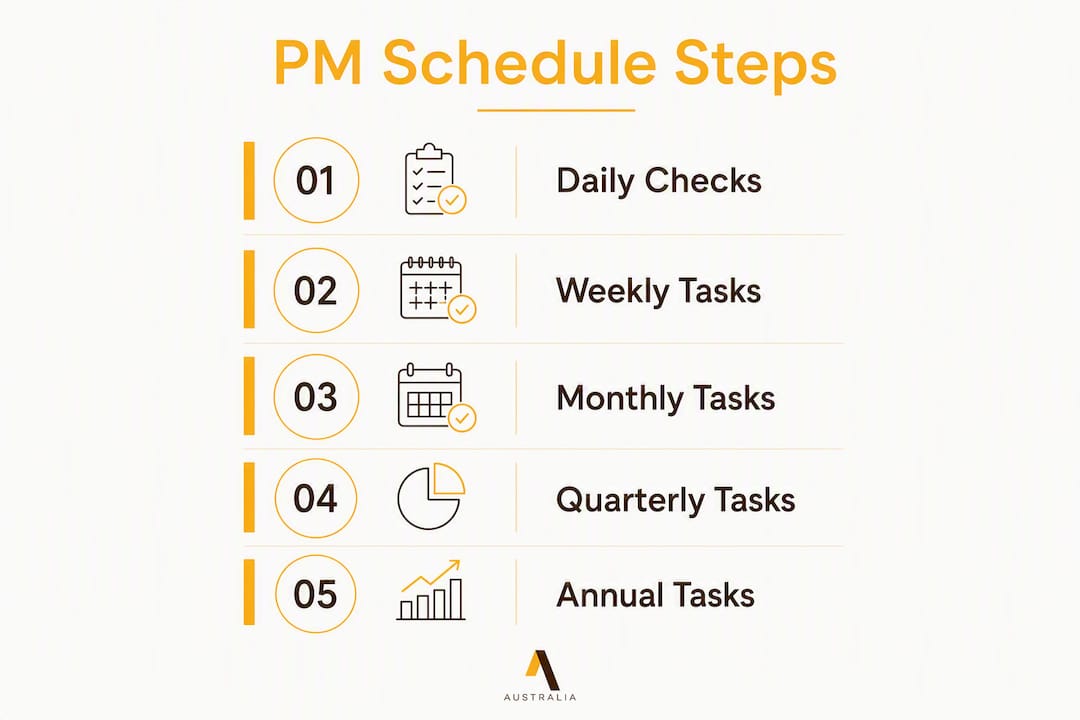
Sample schedule template
| Task | Interval | Approximate calendar (single shift) | Approximate calendar (double shift) |
|---|---|---|---|
| Visual walk-around, coolant, lube, chips | Daily | Daily | Daily |
| Lube system verification, filter check, tramp oil skim | 50 h | Weekly | 3–4 days |
| Spindle runout, backlash, coolant pH, filter change | 250 h | Monthly | 2–3 weeks |
| Vibration analysis, thermal imaging, dimensional test | 500 h | Quarterly | 4–6 weeks |
| Full calibration, hydraulic fluid, spindle bearing assess | — | Annually | 5–6 months |
Calculation example
A machine running two eight-hour shifts, five days a week, accumulates roughly 80 hours per week. The 250-hour interval falls at about three weeks on the calendar. The 500-hour interval falls at about six weeks. Build your schedule around those calculated dates, not the calendar month.
Quarterly review procedure (Year 1)
Experts recommend a quarterly review cadence in Year 1 to adjust task frequencies using actual runtime and material demands. At each quarterly review:
- Pull the PM log and identify any tasks that were consistently completed early (interval too long) or that found no issues over multiple cycles (interval possibly too short).
- Review any unplanned stops or quality escapes that occurred since the last review.
- Adjust intervals up or down by one step and document the reason.
- Update the CMMS schedule to reflect the new intervals.
Pro Tip: Add a simple urgency × impact score (1–3 for each, multiplied) to any backlog items that arise during quarterly reviews. A score of 6 or above goes on the next scheduled downtime window; a score of 9 is an immediate action.
Record-keeping, reporting channels and spare-parts strategy
What to log
Every PM task needs a minimum record: who completed it, what was checked, the measured value (not just pass/fail), and any actions taken. For quality systems like ISO 9001 or AS9100, PM without written records is unverifiable. Axis positioning measurements and geometric checks need to be trended over time so that increasing backlash is detectable before a part fails.
Minimum fields for each PM record:
- Machine ID and date/time
- Task performed and interval (e.g. “250 h spindle runout check”)
- Measured value and pass/fail against threshold
- Technician name and sign-off
- Actions taken or deferred, with reason
Reporting flow
Operator notices anomaly → logs it on the shift report form → notifies shift lead → shift lead assesses urgency → escalates to maintenance technician if required → technician investigates and logs findings in CMMS → escalation to manufacturer service if the finding exceeds in-house capability.
Shops using CMMS or PM software see measurably fewer missed PM tasks and faster diagnostics due to timestamped records and trend logs. Paper-based systems work but require discipline to maintain completeness.
Critical spares inventory
| Part category | Examples | Stock rule |
|---|---|---|
| Filters | Coolant tank, cabinet air, way oil, hydraulic | Min 2 per machine; reorder at 1 |
| Seals and wipers | Way wiper seals, hydraulic seals | Min 1 set per machine |
| Belts | Spindle drive, coolant pump, axis drive | Min 1 per type per machine |
| Lubrication consumables | Slideway oil, grease cartridges | Min 4 L / 2 cartridges |
| Spindle components | Drawbar springs, retention knobs | Min 2 per machine |
| Hydraulic filters | Return line, pressure line | Min 1 per type |
Lead time is the key variable. For parts with a four-week lead time from your supplier, your reorder point needs to account for that gap. Review lead times annually — supply chains change.
Pro Tip: Codify “odd noise” and “unusual feel” reports as immediate stop-and-inspect triggers. Give operators a three-field logging template: what they heard or felt, when, and at what operation. A logged anomaly that gets investigated within the shift costs far less than one that runs for two days.
Condition monitoring: the data your PM programme should be collecting
A PM programme that only completes tasks on a schedule is useful. One that also trends measurements is predictive. The difference is whether you catch a developing fault two weeks before failure or two hours before.
Metrics to collect
- Spindle temperature: daily, infrared thermometer at bearing housing; log against time and hours
- Spindle vibration: quarterly minimum, accelerometer; compare to baseline
- Axis servo current: available from most CNC controllers; rising current on a given axis at a given feedrate indicates increasing friction or mechanical resistance
- Backlash (all axes): monthly, dial indicator; trend against baseline
- Spindle runout: monthly, test bar and dial indicator
- Coolant concentration and pH: weekly concentration, monthly pH
- Lubrication delivery confirmation: weekly, visual check at endpoints
- Run hours: log from controller; use to trigger interval-based tasks
How to trend effectively
Establish a baseline on a recently serviced or new machine. Take readings at consistent conditions — same warm-up state, same load, same measurement point. Plot readings on a simple chart in your CMMS or even a spreadsheet. Set an amber threshold at 70% of the alarm limit and a red threshold at the alarm limit. When a reading crosses amber, increase the measurement frequency and schedule an inspection.
Trend measurements such as backlash and runout identify deterioration before part quality is affected. A ballscrew that is developing wear will show a consistent upward trend in backlash over three to four monthly readings before it causes a positioning error large enough to scrap a part.
Implementation options
- Handheld instruments: infrared thermometer, dial indicator, refractometer, vibration pen — low cost, suitable for most shops
- Inline sensors: spindle temperature sensors wired to a data logger or controller I/O — continuous monitoring, higher setup cost
- CNC controller logs: most modern controllers log servo current, alarm history, and run hours natively; export and trend these
- CMMS integration: connect controller data exports to your CMMS for automated threshold alerts and trend charts
A colour-coded dashboard — green within threshold, amber approaching limit, red exceeded — is the fastest way to give a maintenance manager a machine health overview at a glance.
How an Anderson-recommended PM programme works
Anderson Group Australia has been supplying high-precision CNC machining equipment to Australian manufacturers since 1972, across woodworking, metalworking, composites, and advanced materials. The Anderson machine range covers vertical machining centres, 5-axis machines, panel processing, and production machining centres with auto pallet changing — each with documented maintenance procedures and accessible service points designed to make PM practical on the shop floor.
Anderson-recommended PM schedule (summary)
| Cadence | Key tasks |
|---|---|
| Daily | Visual walk-around, coolant and lube check, chip clearing, spindle warm-up, E-stop test |
| Weekly | Lube system verification, tramp oil skim, filter inspection, coolant concentration check |
| Monthly | Spindle runout, backlash measurement, coolant pH test, filter replacement, machine levelling |
| Quarterly | Vibration analysis, thermal imaging, dimensional accuracy test, compensation parameter review |
| Annual | Full geometric calibration, hydraulic fluid change, spindle bearing assessment, full coolant flush |
Anderson’s service offer for Australian customers includes authorised on-site maintenance, scheduled service contracts, spare-parts kits specific to each machine model, calibration services, and operator and technician training. For machines like the AXXIOM 5-axis series, lube points are designed for accessibility and the maintenance documentation covers model-specific intervals so technicians are not guessing at OEM requirements.
For shops running ferrous or non-ferrous metalwork, Anderson’s metalwork CNC machinery range comes with material-specific guidance on coolant selection and PM intervals — relevant because cutting steel and cutting aluminium place different demands on coolant chemistry and tool change frequency.
Pro Tip: When requesting a PM scoping visit from Anderson, prepare a list of your current machine models, approximate annual runtime hours per machine, and any recurring fault codes or quality issues. That information lets the service team prioritise the highest-risk machines and tailor the service contract scope.
Key takeaways
A usage-based CNC preventive maintenance programme — daily operator checks, hours-based scheduled tasks, and trended condition data — is the most reliable way to maintain precision and avoid unplanned downtime across a CNC shop.
| Point | Details |
|---|---|
| Daily checks are non-negotiable | A 10–30 minute pre-shift routine per machine prevents most shift-level failures and costs nothing beyond operator time. |
| Hours-based scheduling beats the calendar | Convert OEM intervals to runtime hours and recalculate calendar dates for each shift pattern. |
| Trend measurements, not just pass/fail | Log spindle runout, backlash, and temperature at every check; a rising trend catches faults before scrap occurs. |
| Keep critical spares on the shelf | Filters, seals, belts, and spindle consumables with long lead times should be stocked at minimum two units per machine. |
| Anderson supports the full PM lifecycle | Anderson provides authorised service, spare-parts kits, calibration, and training for Australian manufacturers. |
Moving a shop from break-fix to a preventive maintenance culture
The hardest part of implementing a PM programme is not the checklist — it is getting operators to trust that logging a problem will not get them in trouble. In most break-fix shops, the unspoken rule is: if the machine is running, don’t touch it. Changing that takes visible management commitment and a few early wins.
Start with one or two machines, not the whole floor. Pick the highest-utilisation machines or the ones with the most unplanned stops in the last six months. Run the daily and weekly checklists on those machines for 90 days and track the number of unplanned stops. When the numbers drop — and they will — share that result with the team. Operators who see that their daily checks prevented a breakdown are far more likely to maintain the habit than operators who are told PM is important in a toolbox meeting.
The initial backlog of deferred maintenance is the other challenge. Most shops starting PM discover that several machines have overdue oil changes, worn belts, or coolant that has not been changed in over a year. Do not try to remediate everything at once. Triage by urgency × impact, address the highest-risk items in the first planned downtime window, and schedule the rest across the following quarter. Running a machine with known deferred maintenance is a calculated risk; running it without knowing the state of maintenance is a different problem entirely.
Operator buy-in comes from simplicity. A one-page laminated checklist on the machine, a simple paper log on a clipboard, and a clear escalation path — that is all most operators need to start. Add digital tools once the habit is established, not before.
Anderson Group Australia: PM setup, service contracts and spare-parts kits
Precision CNC equipment is only as reliable as the maintenance programme behind it. Anderson Group Australia offers Australian manufacturers a direct path from reactive maintenance to a structured, manufacturer-aligned PM programme — without the guesswork of building it from scratch.

Anderson’s on-site PM scoping visits assess your current machine fleet, identify the highest-risk gaps, and produce a tailored maintenance schedule mapped to your actual shift patterns and runtime hours. From there, scheduled service contracts cover authorised technician visits at 500-hour and 1,000-hour intervals, spare-parts kits specific to your machine models, and annual geometric calibration. Operator and technician training is available for shops that want to build more in-house capability.
To request a site visit or service contract quote, contact Anderson through andersonaustralia.com and have your machine models, approximate annual runtime, and any recurring fault history ready. For model-specific maintenance details and spare-parts availability, the Anderson industries page covers the full range of sectors Anderson supports across Australia.
Further reading and useful references
The sources below were used in preparing this guide and are worth bookmarking for ongoing PM reference.
| Resource | What to look for |
|---|---|
| Centroid maintenance schedule | Detailed OEM maintenance schedule with interval tables; useful as a template for building your own hours-based schedule |
| Field Eagle CNC PM Guide | Spindle bearing temperature thresholds, coolant pH guidance, and digital inspection scheduling overview |
| Cryotos CNC Maintenance Guide | Daily check time estimates, quarterly review rationale, and CMMS adoption guidance |
| UTEC CNC PM Checkpoints | Spindle warm-up procedure, ISO 230-3 reference, way-wiping technique, and trending methodology |
| OxMaint CNC PM Checklist | Control cabinet filter guidance, machine lifespan data, and hours-based interval conversion |
| Anderson Group Australia — machine range | Model-specific maintenance documentation and spare-parts availability for Anderson machines |
A note on OEM manuals: every machine has its own maintenance intervals for lubrication, belt tension, and calibration. The schedules in this guide are industry-standard starting points. Always cross-reference against the OEM manual for your specific model and record those intervals in your CMMS as the authoritative source for that machine.