
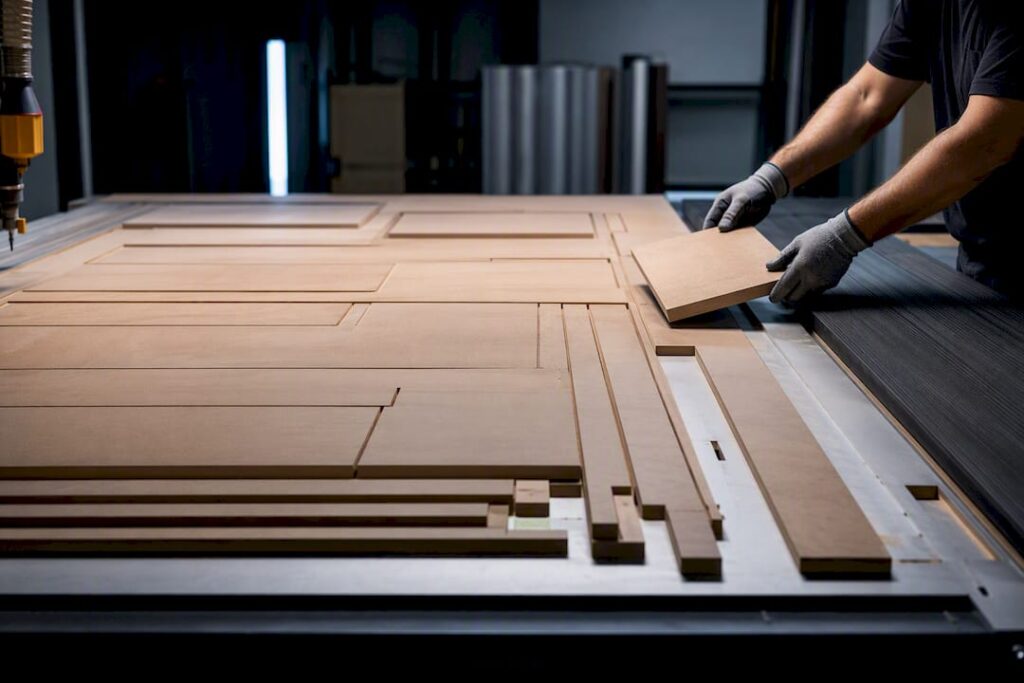
A nesting-led workflow, design, then nest, then CAM and G-code, then CNC machining, then staged assembly and QC, is the fastest, lowest-risk path for small and medium cabinet shops to lift throughput. The single highest-impact change is a standardised job package: complete nest files, cut list, hardware BOM and clear labelling, released before the machine ever starts cutting. Everything below breaks that into steps you can apply this week.
TL;DR:
- A complete job package with locked BOM, revision number, and detailed nesting PDFs is crucial to prevent delays and remakes.
- Batch nesting across multiple jobs improves machine utilization but requires tighter labeling discipline and consistent grain orientation.
- Good G-code validation through collision checks, simulation, and dry runs minimizes errors and reduces rework during machining.
- Small process adjustments, such as rotating part orientation or grouping similar finishes, can increase yield by up to 15 percent without new equipment.
- Investing in automation makes sense only once consistent volume exceeds current capacity, as process discipline yields more immediate benefits.
Table of Contents
- What does a CNC cabinet production workflow actually look like?
- How do you prepare designs and nests so the floor never stalls?
- How do you turn a cabinet design into reliable G-code?
- What machine setup and tooling reduce cabinet part rework?
- What post-machining steps stop remakes before assembly?
- How can you improve yield and throughput without buying new equipment?
- What does Anderson Group Australia recommend for shop-floor discipline?
- When should you invest in automation instead of fixing process?
- How Anderson Group Australia supports a nesting-led cabinet workflow
- Where to go for more detail
- Sources
- FAQ
What does a CNC cabinet production workflow actually look like?
Cabinet manufacturing runs through five stages: design and job release, nesting, CAM and G-code generation, CNC machining, then post-machining prep and staged assembly. This mirrors the standard flow described by AIS Cabinet’s manufacturing process, which moves from design and material selection through precision cutting to hardware fitting and quality checks.
Each stage produces a specific handoff:
- Design/job release hands off a finished cut list, hardware BOM and revision number.
- Nesting hands off optimised sheet layouts ready for CAM.
- CAM/G-code hands off verified, collision-checked machine files.
- CNC machining hands off cut, bored and labelled parts.
- Staging/assembly hands off kitted, QC-checked units ready for install.
Shops running one or two elevations at a time can nest per job. Shops running batches across multiple kitchens do better with batch nesting across several jobs at once, which needs tighter labelling discipline but pays off in machine utilisation. A single elevation typically nests, machines and stages within a shift; full-kitchen batches often run two to three days depending on part count and edgebanding load.
How do you prepare designs and nests so the floor never stalls?
Most floor delays trace back to an incomplete job package, not a machine fault. Cutlistor’s production-prep guidance is blunt about this: release a job without a locked BOM or a revision number, and you get missing parts and remakes days later.
A complete job package needs:
- Nest PDFs showing exact panel placement and part orientation.
- A cut list matching every part to its cabinet and elevation.
- A hardware BOM covering hinges, slides, fasteners and shelf pins.
- A revision number so the floor never machines an outdated version.
- Machining notes flagging grain direction, finished faces and any grooving requirements.
Nesting itself has two competing goals. Yield-first nesting packs parts tight to squeeze the most out of each sheet, which suits high-volume runs where material cost dominates. Handling-first nesting leaves more breathing room around parts and groups by finish, which suits smaller shops where an extra offcut costs less than a mis-picked panel. Keep grain orientation consistent across a job, group parts by finish so you are not switching stock mid-nest, and use tabs sized to hold parts without leaving marks that need sanding out.
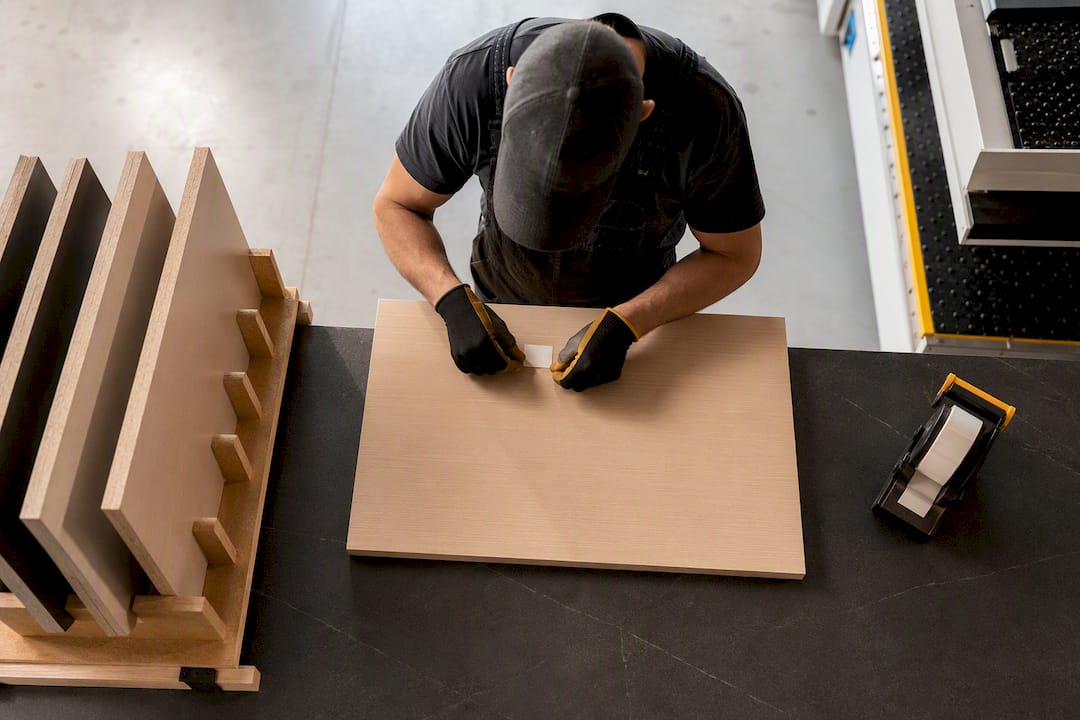
Pro Tip: Label parts the moment they come off the machine, not after the whole sheet is cut. A part sitting unlabelled for ten minutes is a part someone will misplace.
How do you turn a cabinet design into reliable G-code?
The handoff from CAD to CAM to G-code is where good designs turn into bad cuts if nobody checks the file. G-code is the machine language your CNC controller reads to move axes, run the spindle and fire tool changes, and most cabinet shops move files between CAD and CAM as DXF or native cabinet-design formats before the CAM software generates the final G-code.
Before that file ever reaches the machine, run these checks:
- Confirm the tool library in CAM matches the physical bits loaded on the machine, not last month’s setup.
- Verify feeds and speeds against material thickness and the current bit’s condition, not a generic default.
- Check lead-ins and tabbing so parts do not shift mid-cut or fall through the spoilboard.
- Run a collision check against fixtures, clamps and the vacuum table zones you have live.
Simulate the full toolpath in software first, then do a dry run at safe height on the actual machine before cutting real stock. File transfer should follow a version-locked folder structure, one job number, one revision, no loose files floating on a USB stick.
Pro Tip: Keep a “machine-ready” folder separate from your working CAM files. Nobody should ever load a file straight from the design folder onto the router.
What machine setup and tooling reduce cabinet part rework?
Cabinet nesting rewards specific hardware choices. A nesting-capable router with a rigid gantry and a high-flow vacuum table keeps thin panels flat and parts consistent, a point industry equipment guides make repeatedly when comparing router setups for cabinet work. An automatic tool changer saves time on multi-operation jobs but adds cost and complexity that smaller shops may not need if most parts use one or two tools.
Setup priorities that actually move the needle:
- Vacuum table zoning. Match zone size to part size so small offcuts still hold vacuum.
- Spoilboard management. Resurface on a schedule, not when parts start lifting mid-cut.
- Tool selection. Compression bits for melamine and veneered panels, upcut for fast waste removal, downcut where top-face finish matters most.
- Bit life tracking. Log cutting hours per bit; swap on a schedule rather than waiting for a bad cut to tell you.
Before every run, check tool offsets, confirm your zeroing point, let the spindle warm up on cold starts and verify dust collection is pulling properly at the cutting head. A 90 day reliability check with a ballbar test is worth running on any machine you are not fully confident in yet.
What post-machining steps stop remakes before assembly?
Whether you edgeband before or after CNC cutting is a shop-rule decision, and it needs to be written into the job package, not left to whoever is running the machine that day. Pre-banding gives cleaner exposed edges on some cuts; post-machining banding suits shops cutting to exact size first. Either way, document the choice once and apply it consistently.
The sequence that keeps assembly moving:
- Bore and pre-fit hardware immediately after cutting, while the part is still on the cart and easy to handle.
- Label and kit by elevation ID, not just by job number, so a picker can find every part for one cabinet in one spot.
- Stage carts in build sequence, matching the order cabinets go together on the floor.
- Spot-check critical dimensions, hole spacing, panel squareness, edge overhang, and log a simple pass or fail against the cut list.
Shops that release a complete job package with locked BOMs and staging rules see fewer missing parts and fewer remakes reaching assembly, according to Cutlistor’s staging guidance. A five-minute QC pass at this stage is cheaper than a rebuild at install.
How can you improve yield and throughput without buying new equipment?
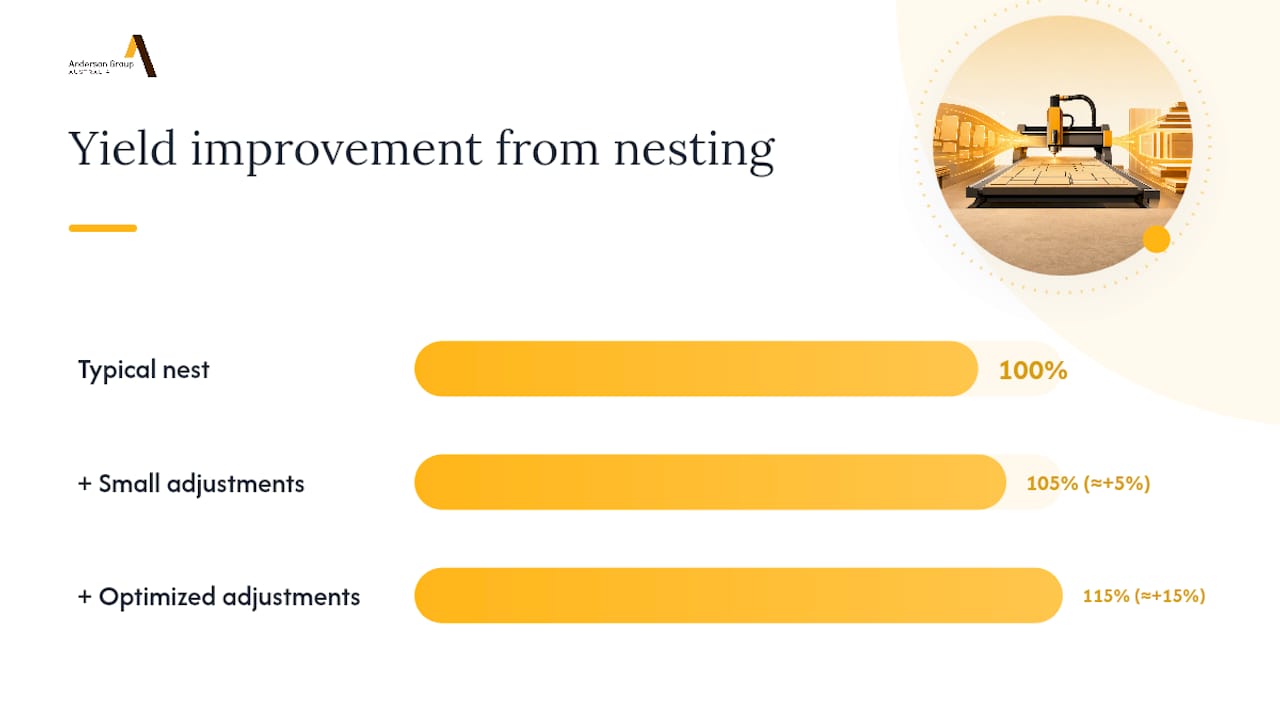
Small nesting adjustments often save real material. Rotating part orientation, tightening tab placement and grouping similarly-finished parts across jobs rather than nesting each job in isolation can lift yield by 5 to 15 percent without touching the machine itself.
Scheduling matters just as much as the nest. Batch jobs by material and finish so the machine is not sitting idle waiting on a sheet change, and queue the next nest while the current one is cutting rather than after.
Track four numbers weekly:
- Yield percentage (usable panel area versus total sheet area).
- Parts per shift.
- Machine utilisation (cutting time versus total shop hours).
- Remake rate (parts recut due to error).
Pro Tip: Run a one-week experiment: rotate your standard nest orientation by 90 degrees on one job type and measure the yield change against your usual layout. Anderson’s shop-floor playbook treats small, reversible experiments like this as the fastest way to find real gains without committing to a permanent process change.
What does Anderson Group Australia recommend for shop-floor discipline?
Anderson’s nested-based manufacturing guidance treats nesting as a shop discipline, not a software setting. One person owns each job package end to end, and a short nest-review meeting before cutting catches errors that would otherwise reach the machine. Applied consistently, this kind of playbook has helped shops bring panel waste down to the 5 to 10 percent range.
A shop-tested starting kit looks like this: a locked job package template covering nest PDFs, BOM and revision control; a daily spindle and tool check logged before the first cut; and a standing nest-review meeting held before any batch goes to the machine. None of it requires new hardware, just consistent habits applied the same way every job.
When should you invest in automation instead of fixing process?
Process fixes deliver the most value when output is inconsistent or remakes are common, that is a discipline problem, not a capacity one. Automation pays once orders consistently demand more than double current capacity, since fully automated batch-one lines need volume to justify their cost.
— Anderson
How Anderson Group Australia supports a nesting-led cabinet workflow
Anderson Group Australia builds the nesting-capable machines this whole workflow assumes you already have. The Genesis PLUS Nesting CNC Machine is built for exactly the yield-first nesting and vacuum-zone hold-down strategy covered above, and for shops running high-volume batches, the production machining centre range adds automatic pallet changing to keep the spindle cutting between jobs rather than waiting on manual loading.
If your current setup is fighting you on vacuum hold, tool changes or spoilboard consistency, that is a machine problem no job-package template will fix. Anderson Group Australia’s woodwork CNC machinery range covers everything from entry nesting routers through to full production centres, and the team can run a shop audit against your actual job mix before you commit to anything. Book a production trial through the full machine catalogue and see how your existing nests perform on a Genesis PLUS before you decide what to buy.
Where to go for more detail
For deeper technical grounding, G-code fundamentals explain what your CAM software is actually generating. Anderson’s panel processing guide and reduce-waste playbook offer ready-to-use templates and experiment ideas for shops ready to tighten their own workflow.
Sources
- How to prepare cabinet parts for production | Cutlistor
- From drawing to finished cabinets | AIS
- G-code — Wikipedia
FAQ
What is the standard CNC cabinet production workflow?
Design and job release, nesting, CAM and G-code generation, CNC machining, then staged assembly and QC, matching the five-stage flow AIS Cabinet documents from drawing to finished cabinet.
How much material waste should a cabinet shop expect?
Shops running a consistent nesting and job-package discipline typically bring panel waste down to 5 to 10 percent, well below what ad hoc nesting produces.
Should edgebanding happen before or after CNC cutting?
Either sequence works, but the choice needs to be a written shop rule in the job package, not a decision left to whoever runs the machine that day.
What causes most CNC cabinet remakes?
Incomplete job packages, missing BOMs, unlocked revisions or poor labelling, are the most common cause, not machine error, according to Cutlistor’s production-prep analysis.
When is it worth buying a nesting-capable production machine?
Once order volume consistently demands more than double your current capacity, a nesting machine like the Genesis PLUS pays for itself faster than process tweaks alone can deliver.