
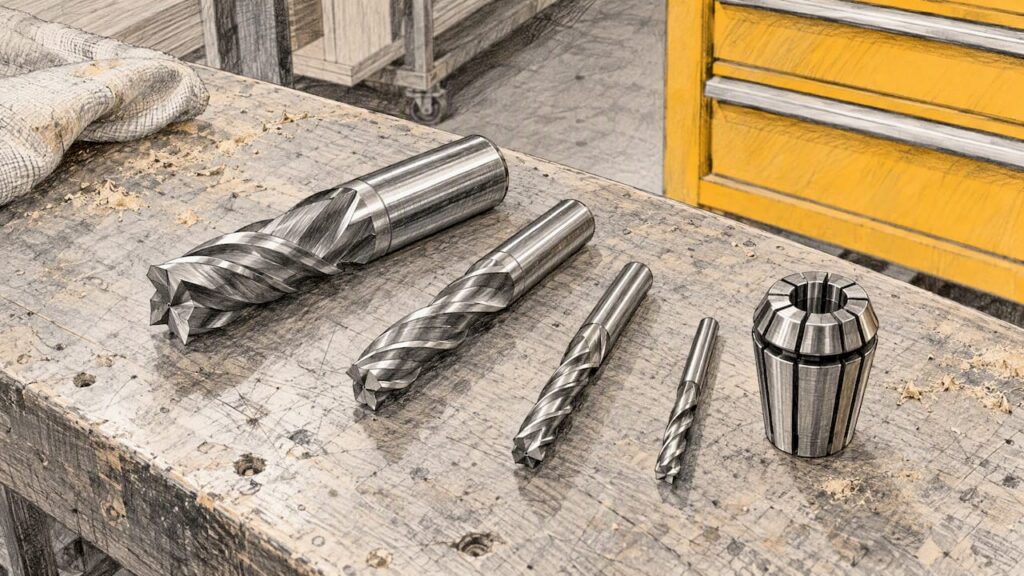
Tooling on a nesting CNC is the set of cutters, collets and holders that turn a sheet of board into parts. The right choice depends on the board you cut, the finish you need and the job (profiling, drilling, grooving or pocketing). Match the cutter geometry to the material, keep the tool holding clean and true, and replace cutters on a planned schedule rather than when the edge fails. This guide sets out how to do that in a cabinet, joinery or furniture shop, and where tool choice ends and machine choice begins.
A note on how we write this. Cutter geometry, feeds and speeds are general workshop guidance, not Anderson specifications. Tool makers publish their own recommendations for each cutter, and your machine’s manual sets the limits for spindle speed, collet size and tool changer. Where we describe a machine capability, we say which product page it comes from. Anderson Group Australia supplies machinery, service and parts. We do not offer subcontract cutting.
TL;DR
- Choose cutters by material and finish first: laminated and melamine board, MDF, plywood, solid timber and plastics each reward a different geometry.
- Compression, upcut and downcut spirals differ in which face they protect. Pick the one that protects the face your customer sees.
- Feed rate, spindle speed and chip evacuation work together. Follow the tool maker’s data as a starting point, then adjust on offcuts.
- Worn tools show up as burn marks, fuzzy edges, rising noise and dimensional drift. Track tool life per cutter, not by feel.
- Tooling cannot fix a machine that is out of tune. Hold-down, dust extraction and maintenance matter just as much.
Table of Contents
- What tooling a nesting machine actually uses
- Cutter types and geometries for nesting cuts
- Matching tooling to the board you cut
- Accuracy, edge quality, yield and cycle time
- Feeds, speeds and chip evacuation
- Recognising worn or damaged tooling
- Holders, collets and tool changing
- Safety around tooling
- Tooling is only part of the setup
- Choosing a machine that suits your tooling plan
- Wood machinery from Anderson Group Australia
- FAQ
- Sources
What tooling a nesting machine actually uses
Nesting is the process of cutting many parts from a full sheet in one program, usually on a flat table with vacuum hold-down. The tooling falls into four groups.
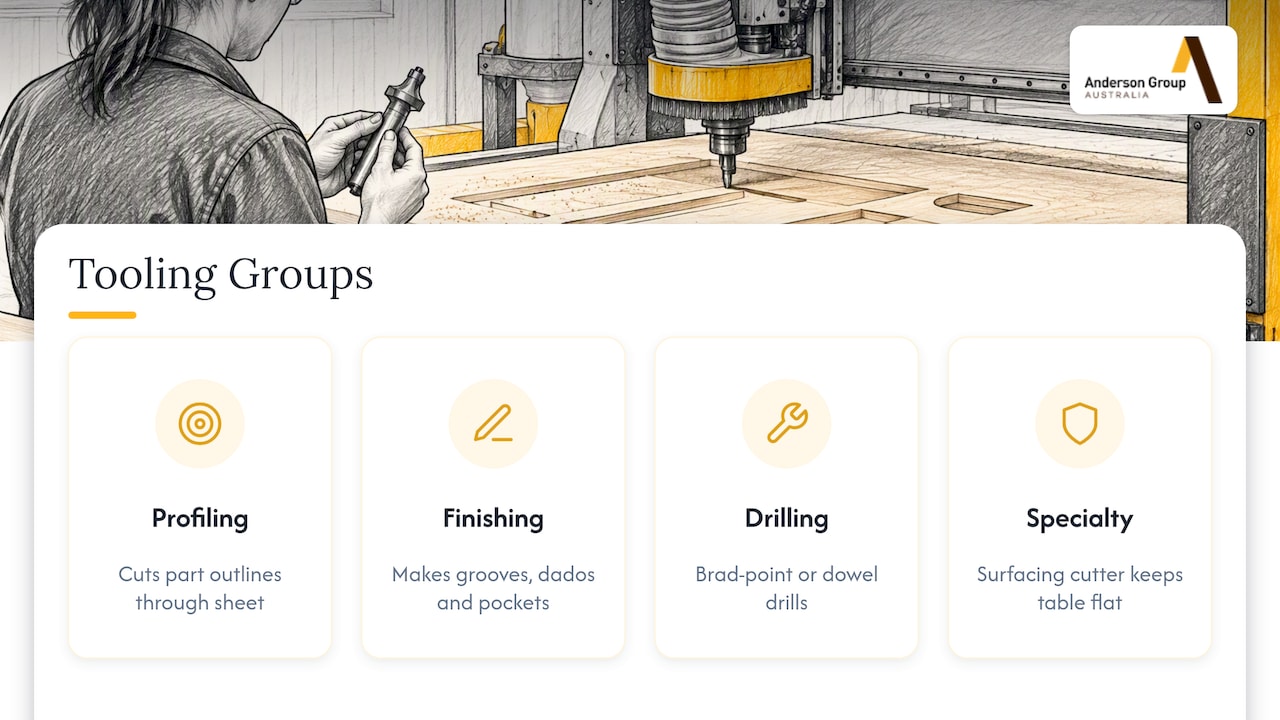
Profiling cutters. These cut the part outline through the full sheet thickness. Solid carbide spiral cutters are the common choice for panel work, with diameters typically in the 6 mm to 12 mm range. A smaller diameter wastes less board between parts but is more fragile and clears chips less freely.
Finishing and pocketing cutters. Straight or spiral cutters used for rebates, grooves, dados and pockets that do not go through the board. Back panel grooves and shelf housings are typical examples.
Drilling tools. Many nesting machines carry a drill block with vertical and sometimes horizontal spindles for hinge cup holes, shelf pin holes and dowel holes. These are a separate tooling family from router cutters: brad-point or dowel drills with their own wear pattern and replacement interval. Whether a given machine has a drill block is a configuration question. Check the specific model page rather than assuming it from the machine family.
Specialty tools. V-groove cutters, surfacing (spoilboard) cutters, chamfer bits and engraving tools. The spoilboard surfacing cutter is easy to overlook. It keeps the sacrificial table flat so that vacuum holds and through-cuts stay consistent.
Behind all of these sit the tool holders and collets. A good cutter in a worn or dirty collet will still run out of true and cut badly.
Cutter types and geometries for nesting cuts
The most common tooling question in a panel shop is which spiral to use. The three main options differ in how the flutes push chips and which face of the board they protect.
| Cutter type | Chip direction | Protects | Typical use | Watch for |
|---|---|---|---|---|
| Upcut spiral | Up, towards the spindle | Bottom face | Solid timber, plywood where the underside shows, deep pockets | Lifts and chips the top face on laminated board |
| Downcut spiral | Down, into the board | Top face | Thin sheets, top-face finish critical | Chips packing into the cut, heat, and vacuum loss |
| Compression spiral | Up on the lower section, down on the upper | Both faces | Melamine, laminated and veneered board cut through full thickness | Needs enough depth of cut to engage both flute sections |
A compression cutter has an upcut section near the tip and a downcut section above it. That is why it suits double-sided melamine and veneered panels. It only works as designed when the cut passes through the full board so both sections engage the material. For shallow grooves, a straight or single-direction spiral is usually the right tool.
Single flute, two flute and more
Fewer flutes leave more room for chips, which suits soft, fibrous or plastic materials that tend to clog or melt. More flutes give a smoother finish and allow faster table speeds in dense board, but have less chip clearance. Your tool supplier can advise on a flute count for your board range. Test it on offcuts before committing to a full sheet.
Diamond-coated and polycrystalline tools
Abrasive boards such as high-pressure laminate or some engineered panels wear plain carbide quickly. Diamond-coated or polycrystalline diamond tools last longer in those materials, at a higher price per cutter. Whether the higher price pays back depends on your volume and material mix, which only your own records can show.
Matching tooling to the board you cut
There is no single nesting cutter. Most shops stock a small range and assign it by material.
Melamine and laminated chipboard. The surface layer is thin and brittle, and chipping shows. Compression cutters are the usual first choice here. Sharpness matters more than any other single factor, because a dull tool lifts the laminate edge.
MDF. MDF is dense and fine-grained, and it dulls tools through sheer abrasiveness. It also makes fine dust, so extraction is critical. Upcut or compression cutters both see use, depending on whether both faces are finished. If the board is painted or lacquered after cutting, edge quality directly affects the finish.
Particleboard. Coarser and more abrasive than MDF at the core. Tool life is shorter, and edge fuzz tends to appear first as the cutter wears.
Plywood. Alternating grain layers and internal glue lines make plywood harder on edges than it looks. Veneer face tear-out is the common problem. We cover cutter choice, hold-down and machine selection for it in our guide to plywood machining on a CNC.
Solid timber. Grain direction and moisture content change the cut. Upcut spirals clear chips well, but expect more tear-out across grain. Nesting machines are built for sheet goods first, and solid timber work is usually limited to smaller jobs.
Plastics and composites. Acrylic, polycarbonate, PVC and similar sheets melt if the cutter rubs instead of cutting. Single-flute cutters with polished flutes and a feed fast enough to carry heat away in the chip are the general approach, but follow the tool maker’s data for the specific plastic. This is a secondary area for us. For machinery suited to these materials see our advanced materials machinery range.
Accuracy, edge quality, yield and cycle time
Tooling is one of four factors that decide how good your parts are. The others are the machine, the setup and the workpiece.
- Machine: spindle runout, table flatness, rigidity and drive quality set the ceiling for accuracy. A cutter cannot make up for a spindle that is out of true.
- Tool: diameter consistency, sharpness and geometry. A cutter that has been resharpened has a slightly smaller diameter, which your program or tool table must account for.
- Workpiece: board flatness, thickness variation and internal stress. Warped or bowed sheets lift off the table and cut inconsistently.
- Setup: vacuum hold-down strength, spoilboard condition, cutter length and tab or onion-skin strategy.
Yield is affected by tool diameter as well. A smaller cutter allows tighter part spacing in the nest. But if the saving in board comes at the cost of broken cutters or slow feeds, the gain disappears. Our piece on lifting yield with a nesting-first workflow covers how nesting layout and workflow interact, and the guide to increasing CNC nesting productivity looks at cycle time.
We do not quote tolerances or cycle times here. Those depend on the exact model, configuration, material and tooling, and should be confirmed for your application before you buy.
Feeds, speeds and chip evacuation
Spindle speed (rpm) and feed rate (mm per minute or metres per minute) together decide the chip load: how much material each flute removes per revolution. The idea is simple and the numbers are not universal.
- Too little chip load and the cutter rubs. That makes heat, burn marks and fast wear.
- Too much chip load and the cutter deflects, leaves a rough edge, or breaks.
A workable approach in any shop:
- Start from the tool maker’s published rpm and feed range for that cutter and material.
- Cut a test piece from an offcut of the actual board, not a different grade.
- Inspect both faces and the edge. Adjust feed in small steps, then rpm if needed.
- Record the settings that work in the tool library, per cutter and per material.
- Recheck when you change board supplier, since density and resin content vary between mills.
Chip evacuation and dust
Chips that stay in the cut get recut, which heats the tool and roughens the edge. Extraction at the cutting point and a suitable spiral direction work together. Dust extraction on a nesting machine is a woodworking dust matter, separate from liquid coolant used in metal machining. Our guide to CNC dust collection covers the extraction side.
The extraction capacity a machine needs depends on the model, dust hood and number of heads. Confirm it for your exact configuration rather than assuming it from the machine family.
Recognising worn or damaged tooling
The cheapest way to protect a good nest is to catch a dull cutter before it wrecks a sheet. Signs to watch for:
- Burn marks or darkened edges, especially on MDF and plywood
- Fuzzy or furry edges on particleboard and MDF
- Chipping on melamine or laminate faces that was not there before
- Rising spindle load or a change in cutting sound
- Parts that drift out of size over a run, or tabs that are harder to clean
- Visible rounding of the cutting edge or chipped carbide under a magnifier
- Resin or glue build-up on the flutes, which can be cleaned with a suitable tool-cleaning product, then rechecked
Two habits keep this under control.
Count by use, not by feel. Log metres cut or sheets cut per cutter. Once you know a cutter’s typical life on your board, swap it at around that point. The right interval is yours to find, because it depends on board, feed and cutter quality.
Decide sharpen or replace in advance. Small-diameter solid carbide cutters are often cheaper to replace. Larger or diamond-tipped tools may be worth sending to a sharpening service. Each sharpening reduces diameter slightly, so update the tool table every time.
Broken or chipped cutters should be removed immediately. Do not keep running a damaged tool to finish a sheet.
Holders, collets and tool changing
Collets and holders wear, and they collect dust and resin. A few practical points:
- Clean the collet and spindle taper whenever you change a tool.
- Use the correct collet size for the shank, and do not mix collet makes on one nut.
- Replace collets that show marks, scoring or uneven wear.
- Insert the shank to the depth the manufacturer recommends.
- Keep cutter stick-out as short as the job allows, since long stick-out increases deflection.
If you are buying a machine, ask what tool changer it has (linear rack, carousel or none), how many positions, and what tool holder standard it uses. These details differ by model and configuration, so confirm them on the specific product page or with us before ordering tooling.
Safety around tooling
Tooling work puts your hands close to sharp cutters and moving parts. WorkSafe WA’s guidance on woodworking machinery says that operators should be authorised, trained and assessed, that machines should be maintained, and that cutters should be enclosed where practicable. It also advises isolating the machine before cleaning or maintenance, and recommends hearing, eye and respiratory protection where required.
In practice, that means:
- Isolate and lock out before you change a cutter or clean a collet.
- Wear the PPE your risk assessment requires, including eye and respiratory protection around dust.
- Use machine-specific procedures for tool changes, written down and trained.
- Use mechanical feeding where possible, as the same guidance recommends.
That guidance is from Western Australia. Requirements differ by state and territory, so check your own regulator. For the machine safety standard side, see our article on AS/NZS 4024 for CNCs.
Tooling is only part of the setup
Shops sometimes chase tool brands when the real fault is elsewhere. Before you change cutters, check:
- Vacuum hold-down: a sheet that shifts will leave a bad edge with any tool.
- Spoilboard: resurface it on a schedule, and replace it when it is thin or damaged.
- Spindle and bearings: a noisy or hot spindle needs service, not a new cutter.
- Maintenance: a routine checklist saves unplanned stops. Our CNC preventive maintenance guide gives a shop-floor schedule.
- Operator training: consistent tool changes and offsets depend on people knowing the routine. See installation and operator training.
Choosing a machine that suits your tooling plan
Tooling choices follow from the machine and the work. Before you buy, think through the following.
- Material mix. Mostly melamine and MDF cabinetry? Plywood and veneer? Some plastics? That drives cutter range and spindle needs.
- Volume. Sheets per shift determine how fast tools wear and whether you need an automatic tool changer or more automation. Our guide to sizing nesting machine production capacity walks through the maths, and automated nesting lines cover higher-volume cells.
- Operations on the machine. Nesting and routing, drilling, edgebanding and panel return are different jobs. Anderson keeps these model families distinct: ATS is nesting, routing and drilling, AFS models are edgebanders, ADM is six-sided drilling and routing, and ARS is a panel-return system. Tooling for each differs.
- Extraction. Confirm the dust extraction your layout needs.
- Service and parts. Ask what spares, consumables and service support are available for the model. Do not assume stock levels or response times. Ask us to confirm the agreed scope.
If you also machine metal or aluminium, that is a different tooling world, with coolant and different cutters. Those applications belong on the metal machinery range, not on a wood nesting machine.
Wood machinery from Anderson Group Australia
We supply industrial woodworking, nesting and panel-processing machinery to Australian kitchen, cabinet, joinery and furniture manufacturers, along with servicing and parts. If you are specifying a machine around the board you cut and the cutters you plan to run, tell us about your application and we will help you match it to a suitable model, using the specifications on the product page.

See our wood machinery range or contact Anderson Group Australia to discuss your production and request a quote.
FAQ
What is the best cutter for nesting melamine board?
A compression spiral is the usual starting point, because it protects both the top and bottom faces of laminated board. It needs to cut through the full thickness to work as designed. Sharpness matters greatly, so replace it before the edge begins to chip.
How often should nesting cutters be replaced?
There is no universal interval. Tool life depends on the board, feed rate, cutter grade and machine condition. Log metres or sheets cut per cutter, find the point at which edge quality starts to fall on your material, and swap tools just before it.
Can I use the same tooling for plastics as for MDF?
Usually not. Plastics tend to melt and re-weld around the cutter, so they generally call for cutters with fewer flutes and good chip clearance. Check the tool maker’s guidance for the specific plastic and test on offcuts.
Do drill bits and router cutters wear the same way?
No. Router cutters wear at the edge and flute, and show it in burn or fuzz. Drills lose their point and cutting spurs, and show it in ragged hole edges or breakout. Track each on its own schedule.
Does the machine model change what tooling I can use?
Yes. Spindle speed range, collet size, tool changer type and extraction vary by model and configuration. Check the exact product page, or ask us to confirm before you order tooling.