
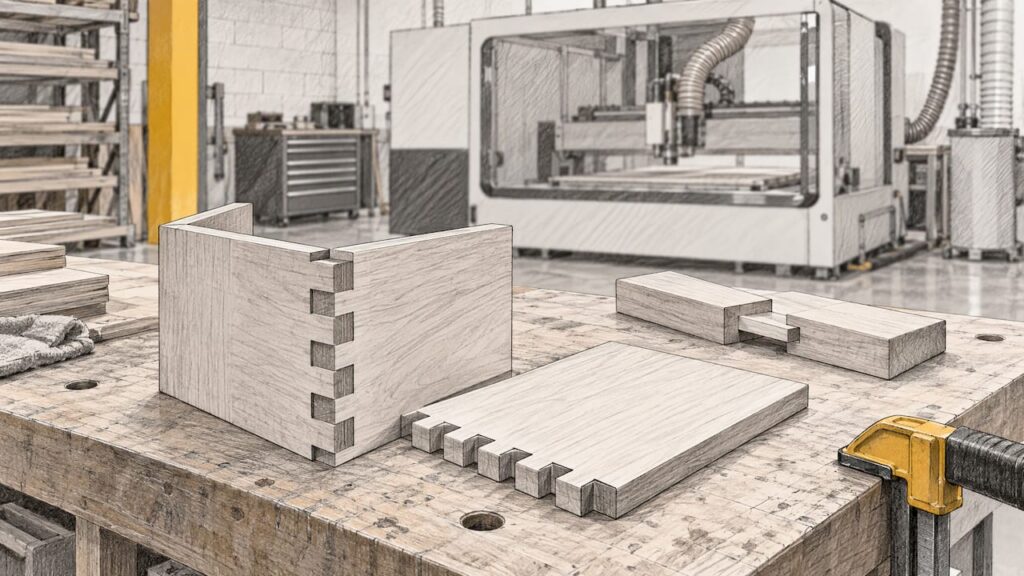
CNC joinery works when you design the joint around the round cutter, not around a hand-tool drawing. Add corner relief, set clearances from measured material, prove the fit on scrap, and match the joint to the job: dados and tongue-and-groove for panel casework, box joints for drawers and cases, mortise and tenon for frames, sliding dovetails where parts must resist being pulled apart. The machine you cut on decides how much of this you can do in one setup, which is why joinery is a machine-selection question as much as a design one. If you build kitchens, cabinets or furniture, our wood machinery range is where that conversation starts.
TL;DR
- A round router bit cannot cut a sharp inside corner, so every square-cornered joint needs relief (dogbone or T-bone) or a rounded mating part.
- Choose the joint by the load and the product: panel casework suits dados and rebates, drawers suit box joints, frames suit mortise and tenon, and pull-apart resistance suits dovetails.
- Measure the actual sheet or board thickness, cut a test coupon from the same batch, and adjust the CAM offset instead of forcing the assembly.
- Hold-down, tooling and machine format determine whether a joint is repeatable across a full production run.
- Anderson Group Australia supplies CNC machinery, servicing and parts to kitchen, cabinet, joinery and furniture manufacturers. We do not offer subcontract cutting.
Table of Contents
- Which CNC joint suits which job
- The one constraint behind every CNC joint: the round cutter
- Panel joinery for cabinets and kitchens
- CNC box joints: sizing and spacing the fingers
- CNC mortise and tenon for frames and furniture
- CNC dovetails: the demanding one
- Tune the fit with measurement, not force
- Tooling, hold-down and machine format decide repeatability
- Choosing a machine for your joinery
- Talk to us about your application
- FAQ
- Sources
Which CNC joint suits which job
Start with what the joint has to do, then choose the geometry. The University of Melbourne’s machine workshop reference associates mortise and tenon with framing and bracing, such as rails into legs, and dovetails with edges that need high tensile strength. That is a sound starting rule for CNC too.
Woodsmith lists the CNC-cut joints that come up most: tongue and groove, box joints with dogbone or T-bone relief, blind box joints, step joints and blind mortise and tenon. For a production shop, we would sort them like this:
| Joint | Typical use | What the cutter has to deal with |
|---|---|---|
| Dado or housing (including blind dado) | Shelves, fixed partitions, casework assembly | Width must match the real panel thickness |
| Rebate and tongue and groove | Cabinet backs, panel edges | Depth control and consistent hold-down |
| Box (finger) joint | Drawer boxes, carcase corners | Inside corners need relief |
| Blind mortise and tenon | Frames, table and chair rails | Round-ended mortise versus square tenon |
| Sliding dovetail | Shelves and dividers that must not pull out | Needs a dovetail cutter and a two-step toolpath |
The first two rows are where most kitchen and cabinet work sits. The last three are more common in furniture and joinery shops. Many shops use all of them, which is why format, tooling and workholding matter more than any single joint.
The one constraint behind every CNC joint: the round cutter
Woodsmith puts the core limit plainly: a router bit cannot cut a sharp 90° corner and always leaves a radius equal to the bit’s. A 6 mm cutter leaves a 3 mm radius in every inside corner. A guide from Kenny Nyhus Fadil makes the same point and notes that this radius can stop box joints from closing.
There are two ways to deal with it:
- Relief. Extend the toolpath slightly into the corner so the mating square corner has room. A dogbone relief runs diagonally into the corner. A T-bone runs along one wall. The T-bone is usually easier to hide because the relief sits on one side of the joint.
- Matching radii. Round the corner of the mating part (for example, a tenon) or square the mortise ends afterwards.
When relief is skipped, a tight-fitting CNC joint binds on the radius rather than the face. That is the most common reason a joint that looked perfect on screen will not close.
Where relief shows, choose a joint that hides it. Blind joints, joints on the inside face of a carcase, or joints covered by a back panel all let you use generous relief without it affecting appearance. A smaller cutter reduces the radius, but it cuts more slowly and deflects more. Make that trade deliberately per joint.
Panel joinery for cabinets and kitchens
For flat-pack and carcase work, the most productive CNC joinery is also the least glamorous. Dados, rebates, tongue and groove, and tab-and-slot connections cut in the same program as the nested parts, so the joint geometry comes out of the same setup as the profile. That is the idea behind panel processing on a nesting machine: parts leave the table ready to assemble.
Three practical points for panel work:
- Design from real thickness. Nominal 16 mm or 18 mm board is rarely exactly that. Measure the actual batch with calipers and put the working thickness into the design, then keep that number in your CAM library per supplier or batch.
- Plan blind dados and grooves before assembly. For anything that takes a back or base panel, cut the grooves as part of the same program so they are never an afterthought at the bench.
- Keep drilling distinct. Hinge, shelf-pin and fixing holes are a separate operation from routed joinery. Our guide to when to bore or drill on CNC covers that decision, and our comparison of CNC drilling versus manual drilling for cabinetry covers the overnight-run question for Australian cabinet shops.
Sheet material has its own behaviour. Veneer faces chip, and cross-ply cores are abrasive. Our guide to plywood machining on a CNC covers tooling, hold-down and machine choice for exactly that, and it applies directly to dado and rebate quality.
CNC box joints: sizing and spacing the fingers
Box joints are the classic CNC corner joint for drawers and boxes, and the arithmetic matters more than the toolpath.
Spacing. Divide the board width by your chosen finger width and aim for a whole, odd number of divisions so the pattern is symmetrical. Kenny Nyhus Fadil notes that a partial finger left at one edge means the spacing was not planned. Fine Woodworking describes pinned box joints divided into five or seven equal fingers for the same reason: symmetry.
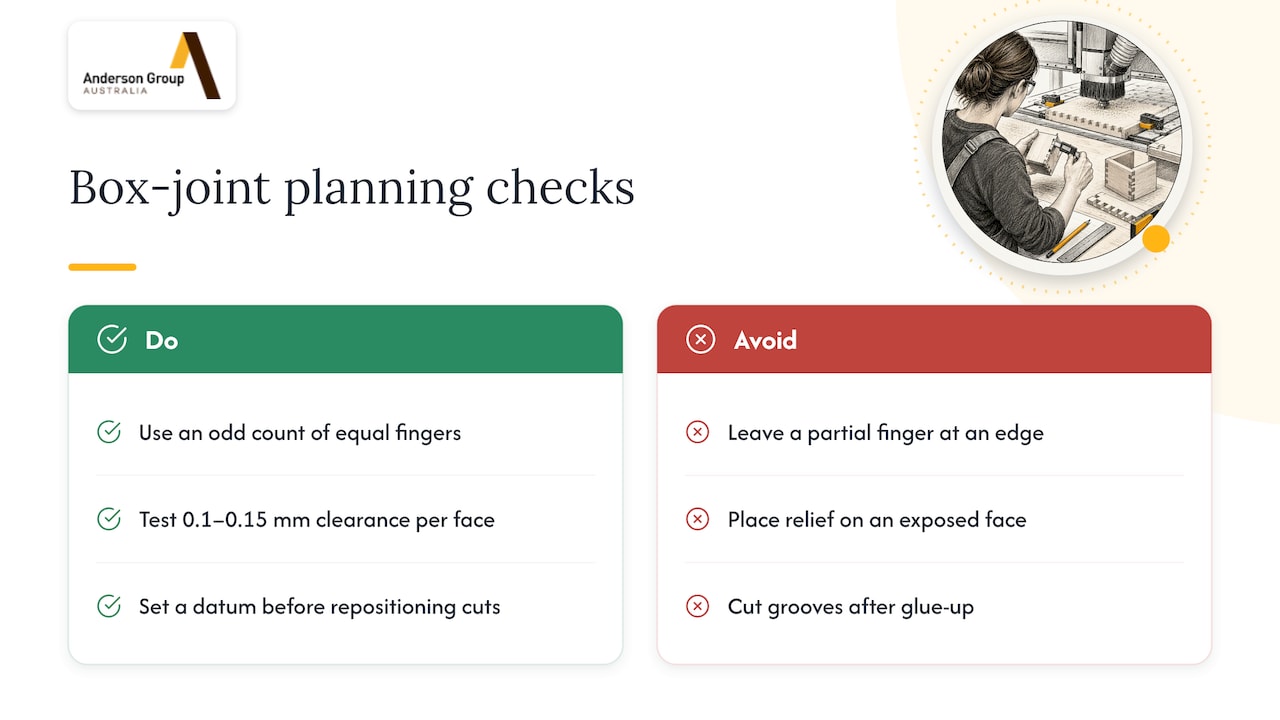
Clearance. The same guide suggests starting plywood box joints at 0.1 to 0.15 mm clearance per face, then adjusting from test cuts. Treat that as a starting point for a test, not a rule. Your material, cutter and machine will move it.
Relief. Every inside corner of a flat-cut box joint needs relief. Put it on the face that will be hidden once the box is assembled.
Before glue-up. Fine Woodworking’s advice for box joints is to cut any grooves for bottoms or backs first, and to dry-fit so everything goes together tightly and squarely.
When the board is larger than the cutting format, joinery has to be cut in more than one position. That is a layout and workholding problem, so plan the datum before the toolpath. Our article on CNC workholding methods and datum logic explains how to keep parts from distorting and keep repositioned features aligned.
CNC mortise and tenon for frames and furniture
Mortise and tenon suits rails, legs, frames and bracing. On a CNC router the mortise is the easy part, because it is a pocket. The tenon is the harder part because it needs to be cut from more than one side. As Woodsmith points out, a CNC cannot cut from all sides unless parts are indexed or flipped.
Some points that decide fit:
- Match the ends. The mortise will have rounded ends. Either round the tenon to match, or square the mortise ends with a chisel. Forcing a crisp square tenon into a rounded mortise crushes the corners and gives a sloppy joint. Kenny Nyhus Fadil’s phrase for this is that fit beats force.
- Blind mortise depth. The Australian Wood Review method sets a blind mortise 1 mm deeper than the tenon length, so the shoulder seats and glue has somewhere to go.
- Angled tenons. The same article advises not exceeding about 10° on an angled tenon; beyond that, the mortise itself must be angled.
- Glue. For most circumstances PVA works well. The same source notes the exception: flush-faced joints, where wood movement makes the plastic character of the glue visible. It also contrasts PVA with structural glues such as epoxy and urea formaldehyde where joint movement and toughness matter.
Where a chair or table has compound angles on several faces, the question becomes how many axes the machine has. Our article on 5-axis CNC for woodworking looks at where that capability pays off and where it does not.
CNC dovetails: the demanding one
Dovetails are the most machine-dependent of the joints in this guide. Kenny Nyhus Fadil explains that a standard 3-axis machine cannot cut the undercut with a normal endmill. You need a dedicated dovetail bit and a toolpath suited to its geometry. The same guide points to the sliding dovetail as a strong option on CNC.
The Australian Wood Review describes a sensible sequence for sliding dovetails: cut the slot first, and for deeper joints cut the dovetail slot in two passes. The first pass uses a straight bit pre-cut slightly narrower than the dovetail bit. The second pass uses the dovetail bit. Removing most of the waste first reduces load on the dovetail cutter, which is a thin-necked tool.
The same article advises preparing several scrap pieces machined to the same thickness as the work pieces so you can test as you go and avoid removing too much material. For a production run, make that a habit: a coupon from every batch.
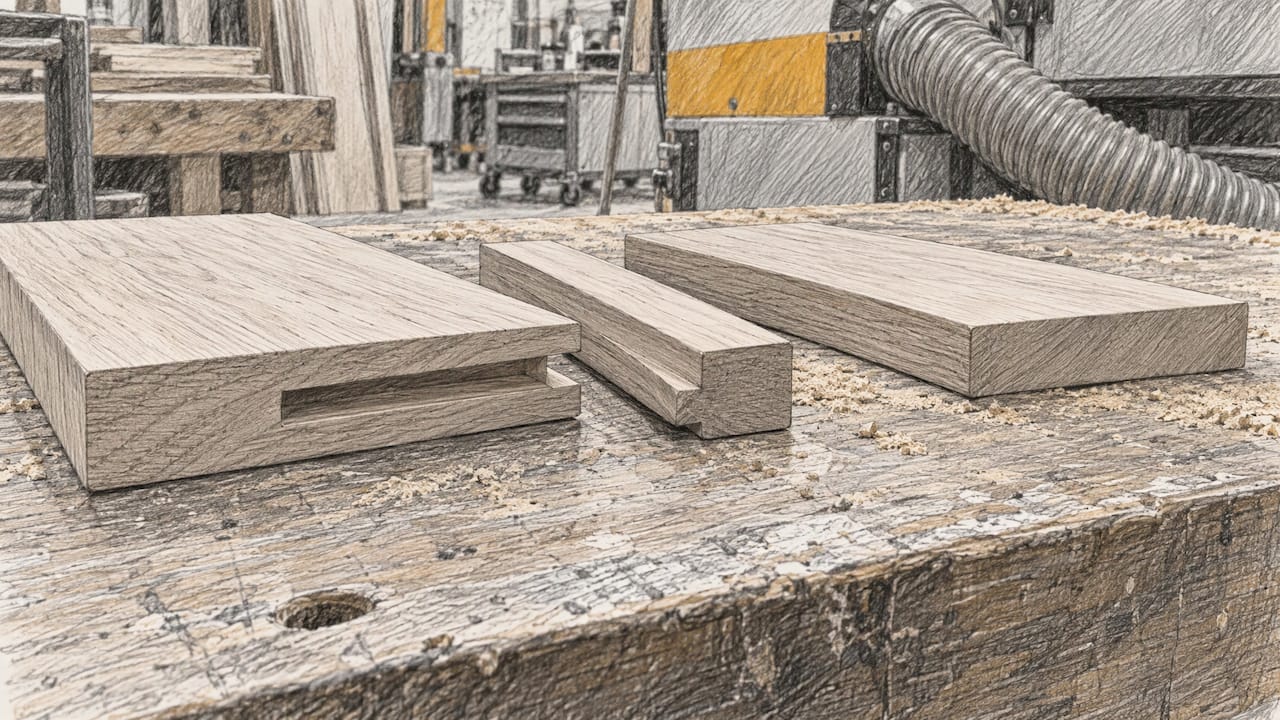
If the job is a drawer corner, a through box joint with a tight test-proven fit is usually the faster path. Keep the sliding dovetail for shelves, dividers and case parts that must resist pull-out.
Tune the fit with measurement, not force
The fix for a joint that is too tight or too loose is almost never at the assembly bench. It is in the CAM offset.
- Measure the material. Take the real thickness with calipers across several points of the sheet or board.
- Cut a stepped test slot. One approach is a gauge with slot widths stepped by 0.05 or 0.10 mm, so you can see which width gives the fit you want.
- Make a coupon. Cut it from the same batch, with the same tool, feed and hold-down as production.
- Check more than fit. Look for bruised edges, raised fibres, shoulder gaps, a part bottoming in a dado, and rocking caused by uneven pocket floors.
- Measure the actual cut widths and adjust the CAM offset or clearance, then re-cut.
- Simulate before cutting. Previewing the toolpath in the CAM simulation catches collisions and confirms tabs and full-depth cuts before material is wasted.
For dovetails and other hand-fitted work, a final pass by hand is normal. The Carpenter’s Guide advises test fitting without a mallet and, if boards will not go together by hand pressure, paring high spots with light shavings until the joint closes firmly with no slop. In production panel work, the goal is the opposite: a joint that needs no hand finishing.
When an inside-corner assembly fails, the usual cause is missing relief. Add dogbones, re-export and re-cut. Do not file corners one at a time across a batch.
Tooling, hold-down and machine format decide repeatability
A joint that fits on the first part and drifts by the fiftieth is a tooling or hold-down problem.
- Cutter wear. A dulling cutter widens the effective cut and burns or tears the edge. Replace on a schedule you have tested on your own material. Our guide to choosing and maintaining nesting cutters covers selection and upkeep.
- Hold-down. Parts that creep during a pass produce gaps. The more small parts you cut, the more this matters.
- Cycle time. Joinery adds toolpaths, and toolpaths add minutes. Our article on increasing CNC nesting productivity is a useful place to look at where those minutes go.
- Format and axes. Flat sheet joinery suits a nesting machine. Solid-wood joinery with several faces, compound angles or undercuts may call for additional axes or fixtures. We do not assume any model has a capability from its family name or axis count. Confirm the exact model and configuration for each option before you plan around it.
Choosing a machine for your joinery
The machine question depends on what you build. A cabinet maker cutting dados, rebates and tab-and-slot parts from sheet has different needs from a furniture maker cutting mortises, tenons and dovetails from solid timber. Work backwards from your joints:
- List the joints you cut each week and the material for each.
- Note the largest part and the sheet size you work from.
- Note how many faces each part needs machined and whether parts must be flipped or indexed.
- Decide whether drilling, edgebanding and joinery will be separate operations or combined in your flow.
Hand that list to a supplier and the recommendation gets specific quickly.
Talk to us about your application
Anderson Group Australia supplies CNC machinery, servicing and parts to manufacturers in Australia. The wood industry represents more than 90% of our customers, mostly kitchen manufacturers, cabinet makers, joinery shops and furniture makers. Our wood range includes nesting and panel-processing machinery such as Genesis PLUS and the Anderson range. Tell us the joints you cut, the materials and your volumes, and we will help you choose machinery for your own production, checked against the actual product page. See the wood machinery range or contact us for a quote.

We sell machinery, servicing and parts. We do not offer subcontract cutting or machining.
FAQ
Can a 3-axis CNC router cut dovetails?
Yes, with a dedicated dovetail bit and a toolpath written for its geometry. A standard endmill cannot cut the undercut. Sliding dovetails are the most practical form on a router. Cut the slot first, then finish with the dovetail bit in a second pass for deeper joints.
Why will my CNC box joint not close?
Usually the inside corners. A round bit leaves a radius, so the square corner of the mating finger lands on it instead of seating. Add dogbone or T-bone relief, then check that the finger count divides the board width evenly. If the joint is still tight, adjust the clearance in small steps from a test cut.
How much clearance should a CNC joint have?
It depends on the material, cutter and machine. One published starting point for plywood box joints is 0.1 to 0.15 mm per face, refined from test cuts. Measure the actual sheet thickness, cut a coupon from the same batch and adjust the CAM offset from what you measure.
Which CNC joints suit kitchen and cabinet manufacturing?
Dados, blind dados, rebates, tongue and groove and tab-and-slot connections are the everyday joints for panel casework. They cut in the same setup as the nested parts. Box joints suit drawer boxes. Mortise and tenon and dovetails are more common in furniture and joinery work.
Does the machine I buy limit which joints I can cut?
Yes. Format, axes, tooling and hold-down all affect what you can cut and how repeatably. Confirm the capability of the exact model and configuration you are considering rather than assuming it from a family name. Tell us your joints and materials and we can discuss which machinery fits your production.
Sources
- Joining, Machine Workshop, University of Melbourne
- CNC Joinery Made Easy, Woodsmith
- Mortise and tenons, types and methods, Australian Wood Review
- The Sliding Dovetail, Australian Wood Review
- CNC Router Joinery: Complete Guide to Wood Joints
- CNC Box Joints: Even Fingers That Close
- Pinned Box Joints, Fine Woodworking
- Dovetail Joints: Step-by-Step Guide, The Carpenter’s Guide