
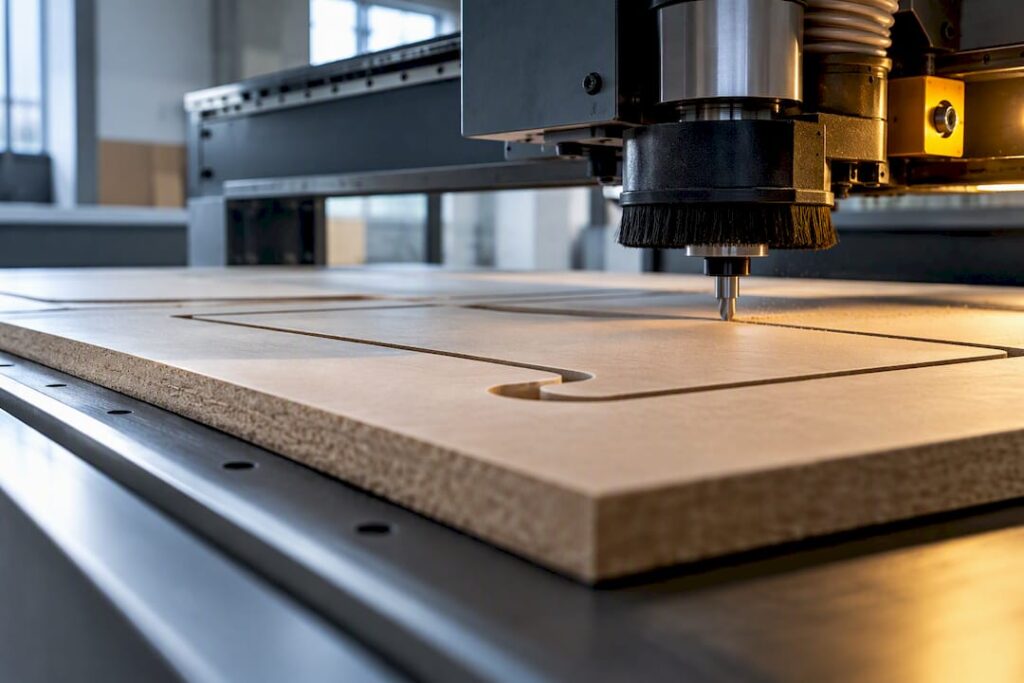
Cabinet CNC machining is the integrated design-to-machine process that turns a cabinet drawing into cut, drilled and profiled panels through automated nesting and CNC routing. Done properly, it delivers tighter tolerances, repeatable joinery, better sheet yield and far less manual setup than saw-and-router lines. Small-to-medium cabinet shops, production fit-out businesses and shopfitters moving into higher volume are the ones who feel the difference fastest.
TL;DR:
CNC nesting can improve sheet utilisation and reduce manual setup. Measure the result on your own part mix; savings depend on layout, grain constraints, workholding and production workflow.
Proper software selection, such as Cabinet Vision or CabMaster, is critical for maximizing machine efficiency and minimizing cycle times.
Shop size, product complexity, and desired volume determine whether flat-bed routers, machining centers, or automated cells are the best fit.
Key specifications include bed size, spindle power, automation features, clamping strategies, and local support availability for maintenance and parts.
Safety measures such as dust extraction, guarding, and compliance with local regulations are essential for safe, volume CNC operation.
Table of Contents
-
What does cabinet CNC machining cost, and what’s the payback?
-
How small cabinet shops adopt CNC without wasting the investment
-
Get your cabinet shop machine-ready with Anderson Group Australia
What does cabinet CNC machining actually cover?
Cabinet CNC machining starts on screen, not on the shop floor. A designer builds the cabinet in CAD, the CAM software nests the parts across a sheet to minimise offcuts, and the resulting toolpaths get sent to the machine as G-code, often alongside part labels and hardware reports. That screen-to-machine handoff is what separates modern cabinet production from a CNC router being used as a glorified jigsaw.
The CNC advantage in cabinet and furniture production comes down to a handful of operations the machine now handles without a second setup: panel cutting to size, drilling for shelf pins and hinges, pocketing for hardware recesses, profile routing for doors and edge details, and pre-machining for edge banding. A machine that used to require four separate stations now does it all in one clamped cycle.
That shifts what a shop chooses to build. Bespoke one-off runs, custom island units or unusual joinery still benefit from CNC accuracy, but the real throughput gains show up in nested sheet production, where dozens of parts from multiple jobs get grouped and cut from the same board.
Typical operations a cabinet CNC handles in a single setup:
-
Full-sheet panel sizing and squaring
-
Shelf pin and hinge drilling to standard 32mm systems
-
Pocketing for cam locks, hinges and connector hardware
-
Edge profiling and door detailing
-
Grooving and rebating for drawer and carcass assembly
-
Label and barcode marking for part tracking through assembly
An overview of how CNC changed cabinet making notes that automating cutting, drilling and joinery in one pass is what let shops standardise output quality regardless of who is running the machine that day. That consistency, more than raw speed, is usually what convinces a shop to make the jump.
Which CNC machines suit cabinet production?
Not every CNC router belongs in a cabinet shop, and the machine class you pick should match your product mix rather than your budget alone. Three broad categories cover most cabinet applications.
-
Flat-bed nesting CNC routers. These are the workhorses of panel processing. A vacuum table or pod system holds sheet stock flat while the router head cuts, drills and profiles across the full sheet. They handle irregular part shapes well and are built for nesting efficiency rather than one-off precision parts, which makes them the natural fit for shops running melamine, MDF or ply carcass production.
-
Woodworking machining centres. Shops combining panel production with solid timber, profiles or more complex joinery should compare the wood machinery range. Confirm the working envelope, drilling directions, tooling and workholding against sample parts before selecting a configuration.
-
Nesting systems with automatic tool changing and material handling. For higher-volume kitchen and cabinet production, Genesis PLUS offers panel nesting, automatic tool changing and load/unload automation. Confirm the selected configuration, available floor space and downstream capacity with Anderson Australia.
The trade-offs worth weighing before you commit floor space are straightforward but easy to underestimate: a nesting router needs a bigger footprint than most shops expect once you add infeed and outfeed space, spindle power dictates how fast you can rout dense boards like particleboard without burning the edge, and every extra axis or automation feature adds cost and commissioning complexity. A shop cutting mostly flat-pack carcasses rarely needs a 5-axis head; a shop doing curved fronts or angled shopfitting work usually does.
What software runs behind cabinet CNC machines?
The machine cuts what the software tells it to cut, and that’s where a lot of shops either gain or lose the advantage of going CNC in the first place. Software selection is arguably as critical as the hardware choice, because the right CAD/CAM package turns a router into a genuine throughput advantage rather than an expensive way to cut one panel at a time.
Cabinet Vision is built specifically for cabinet workflows, linking design, nesting and machine-ready output so programming time drops and machine utilisation goes up. Planit’s Screen-to-Machine tools claim up to 15% cycle-time savings by optimising toolpaths, which is a meaningful number when you’re running the same machine across dozens of jobs a week.
CabMaster takes a simpler route with a drag-and-drop design studio and one-click machining, aimed at shops that want instant nesting without a steep learning curve. It’s a sensible entry point for smaller workshops making their first move off manual programming.
TopSolid Wood offers an integrated CAD/CAM environment with an exact modeller, which cuts tolerance errors on the drawing before they ever reach the machine. It suits shops doing complex or mixed-material assemblies where a small dimensional error compounds across dozens of connected parts.
Before signing up to any package, check these four things:
-
Confirmed post-processor support for your specific machine and controller
-
Automatic part labelling and hardware/cutting reports
-
Licensing model (seat-based versus network) and what it costs to add a second workstation later
-
Training availability, because a powerful nesting engine is wasted if nobody on the floor can drive it
Pro Tip: Ask any software vendor for a live demo using one of your own cabinet drawings, not their canned sample file. How the nesting engine handles your actual part mix tells you more than any spec sheet.
How do you specify the right cabinet CNC machine?
Comparing quotes gets easier once you know which specifications actually change how the machine performs on your jobs, rather than which numbers look impressive on a brochure.
Prepare a cabinet-production brief before comparing configurations
Record the sheet sizes and materials you use, the mix of parts, routing and drilling operations, the way parts are identified, and the space available for loading, unloading and assembly. Bring a representative nest or part drawing and the required finished dimensions to the supplier discussion. Confirm the proposed machine, tooling, workholding and handling options against that brief.
Start with bed size and material handling. A single flat bed suits lower-volume shops, while a shuttle bed or conveyor-fed system keeps the spindle cutting while the next sheet loads, which matters once you’re running more than a handful of full sheets a day.
Spindle specification decides how the machine handles different boards. Look at power (kW), the usable RPM range, and whether the spindle is air or water cooled, since a dense particleboard cuts very differently to a lightweight MDF core. Pair that with the tool changer: a basic carousel with six to eight positions handles most cabinet work, but a shop running varied edge profiles and drill patterns benefits from a bigger magazine and an automatic tool changer rather than manual swaps mid-job.
Confirm the workholding strategy for each part size and operation. Full-sheet nesting commonly uses a vacuum table and sacrificial spoilboard; pods or fixtures suit other woodworking operations. Ask the supplier to demonstrate small-part hold-down using your actual materials and nest layout.
Other specification points worth checking before you buy:
-
Controller compatibility with your chosen software, and a confirmed, tested post-processor rather than a “should work” assurance
-
Dust extraction capacity matched to the machine’s cutting volume, plus a proper LEV interface
-
Local service response times and typical spare parts lead times, not just warranty terms
-
Training packages included at commissioning versus charged separately
A machine that ticks every spec box on paper but has no local support network is a bigger risk than a slightly less capable machine backed by fast parts and servicing.
What does cabinet CNC machining cost, and what’s the payback?
Capital cost bands vary enormously depending on bed size, automation and spindle spec, but a rough shape of the market helps with budgeting. Entry-level nesting routers sit at the lower end and suit shops testing the water with basic panel processing. Mid-range production machines with bigger beds, stronger spindles and automatic tool changers cost considerably more but cut cycle times and handle a wider material range. Higher-end production cells with pallet changers and full automation sit at the top, aimed at shops running multiple shifts.
Running costs matter more than the sticker price over a machine’s working life. Budget for:
-
Tooling: router bits, drill bits and saw blades wear faster than most first-time buyers expect, especially on abrasive melamine-faced board.
-
Software licences and annual maintenance fees for CAD/CAM packages.
-
Scheduled maintenance and spare parts, including belts, bearings and vacuum seals.
-
LEV servicing and filter replacement to keep dust extraction compliant and effective.
-
General consumables: vacuum pod gaskets, clamps and sacrificial spoilboard.
Nesting efficiency is where the real savings show up. Research into nested-based manufacturing in furniture production found that grouping parts to fill a sheet consistently outperforms small batch-of-one cutting on both productivity and material use.
A simple ROI picture looks at three drivers together: machine utilisation (how many hours a day it’s actually cutting), labour saved per cabinet against manual cutting and drilling, and material saved through tighter nesting. A machine running one shift with modest utilisation pays back slower than the same machine run across two shifts with a properly optimised nest, even though the purchase price is identical.
What safety and compliance steps does a CNC workshop need?
A CNC router doesn’t remove safety obligations. It changes what they look like. A documented Safe Work Method Statement (SWMS) or formal risk assessment is expected wherever a machining centre is introduced, and it should cover machine guarding, dust and noise exposure, lockout procedures and pre-start checks specific to that machine and material.
Local exhaust ventilation (LEV) is non-negotiable once you’re routing sheet goods at volume. SWMS guidance for machining centres stresses tool guards, interlocks and documented controls as the baseline, not an optional extra. Where MDF or other UF-bonded board is in regular use, formaldehyde exposure guidance recommends LEV sized to the cutting volume, substitution to lower-formaldehyde boards where practical, fitted respiratory PPE with proper fit-testing, and periodic air monitoring rather than a one-off check at commissioning.
Workflow check: Measure sheet use, handling time and extraction performance during a representative production trial. Material savings do not replace the need for effective dust and noise controls.
Physical guarding rounds out the picture: interlocked doors on enclosed cells, accessible emergency stops, light curtains on open-bed machines where operators work close to the cutting envelope, and administrative controls like signed-off competency for anyone running the machine unsupervised.
Before the machine even arrives, check site readiness:
-
Three-phase power supply matched to spindle and dust extraction draw
-
Floor loading capacity for the machine bed and any material storage racking
-
Dust handling arrangements sized for continuous nesting, not occasional cutting
-
Staging space for incoming sheet stock and outgoing cut parts
How small cabinet shops adopt CNC without wasting the investment
Most shops that get real value from a first CNC follow a similar sequence, whether they realise it or not.
-
Pick the design and nesting software first, before the machine, since the software shapes what machine specification you actually need.
-
Pilot the nesting workflow on paper or in software with real job data before committing to a purchase.
-
Run trial jobs on a demo machine or during commissioning, and verify tool offsets on a sacrificial nest before any live production run.
-
Scale gradually, adding a second shift or a bigger nest size only once the first workflow is proven.
Measure nesting performance using representative cabinet jobs before and after the change. Compare usable parts per sheet, scrap, setup time and rework; outcomes depend on the part mix, software rules and production discipline.
Support that actually affects uptime includes commissioning, operator training, spare parts availability and ongoing maintenance packages, not just the machine sale. The most common pitfalls are avoidable: an underplanned clamping strategy for small parts, dust extraction sized for the wrong cutting volume, and a “should work” post-processor that was never actually tested against the software.
Pro Tip: Run a full-sheet nest with mixed part sizes during commissioning, not just a simple test cut. That’s when clamping, labelling and offset problems actually surface.
What finishing work follows CNC cabinet machining?
CNC machining leaves parts cut, drilled and profiled, but rarely finish-ready straight off the bed. Edge banding is usually the first step, applying PVC or ABS tape to exposed panel edges left raw by the router, matched to the board’s decorative face.
Sanding follows for any solid timber components or routed profiles where the cutter leaves visible tool marks, particularly on curved or detailed edges that a flat sander can’t reach cleanly. Sealing and priming come next, especially on MDF doors or panels destined for spray finishing, since raw MDF edges absorb paint unevenly without a sealer coat.
Spray finishing, whether lacquer, paint or a two-pack polyurethane, is where most cabinet doors and exposed panels get their final appearance. Shops running higher volumes often pair CNC output with an automated spray line to keep finishing throughput matched to cutting throughput, since a fast router feeding a slow finishing bay just shifts the bottleneck rather than removing it.
Hardware fitting rounds out the process: hinges, drawer runners, cam locks and shelf pins go into the pockets and holes the CNC already drilled, which is the entire point of machining those positions accurately in the first place. A well-programmed nest means hardware fitting becomes a fast, repeatable assembly step rather than a fiddly manual drilling job on the bench.
How do you maintain a cabinet CNC machine properly?
Daily checks matter more than most new operators expect. Before the first cut of the day, clear dust and offcuts from the bed and rails, check vacuum pod seals for wear, and confirm tool offsets haven’t drifted since the last shutdown.
Weekly maintenance should cover lubrication of linear guides and ball screws per the manufacturer’s schedule, a visual check of belts and drive components, and a clean-out of the dust extraction ductwork near the cutting head where fine dust tends to build up fastest.
Monthly and quarterly tasks go deeper: checking spindle bearing condition and cooling system performance, verifying axis calibration against a known reference part, and inspecting electrical cabinets for dust ingress, which is one of the most common causes of unplanned control system faults in timber workshops.
Spare parts planning deserves as much attention as the maintenance schedule itself. Vacuum pump seals, spindle collets and drive belts are consumables that fail eventually, and knowing your supplier’s typical lead time before a part fails, rather than after, is what keeps a breakdown from turning into a week of lost production.
What are the most common cabinet CNC machining problems?
Most recurring issues trace back to a handful of causes, and recognising the pattern saves hours of guesswork on the shop floor.
Parts lifting or shifting mid-cut is almost always a clamping problem, usually a vacuum pod covering too little surface area for a small or oddly shaped part, or a worn seal losing suction under load. Burnt or melted edges on melamine or laminated board point to feed rate or spindle speed mismatched to the material, often after a tool change to a duller bit that nobody noticed.
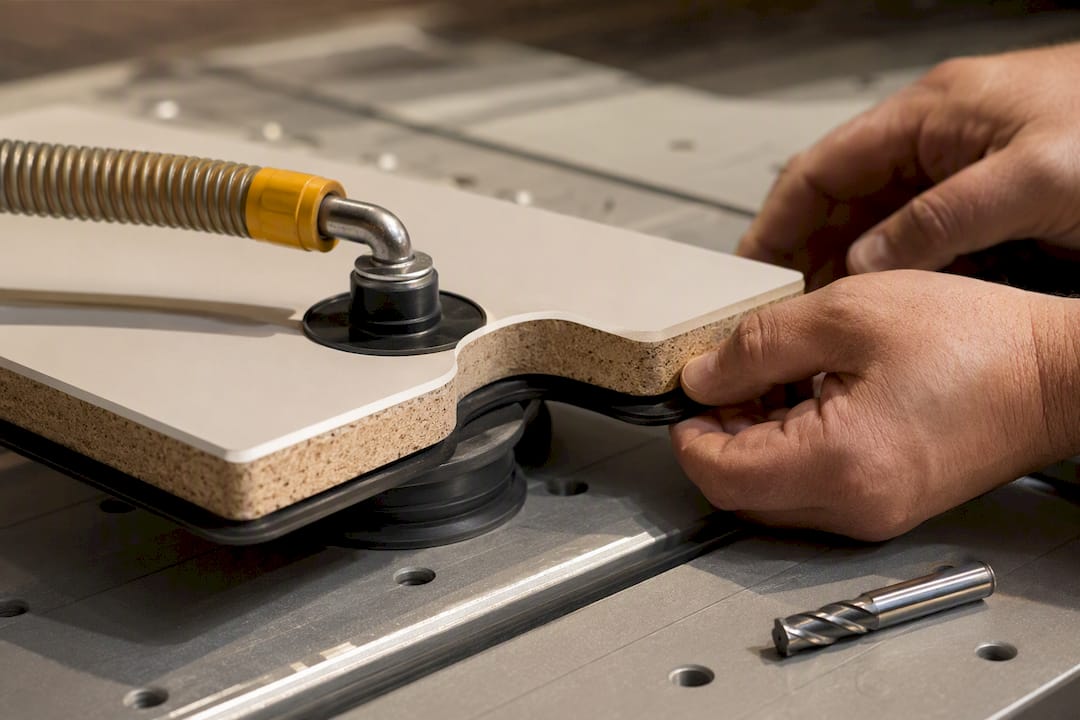
Dimensional drift, where parts start coming out slightly oversized or undersized after running fine for weeks, is frequently a tool offset that was never reverified after a bit change, or wear in the collet holding the tool. Nesting software producing inefficient layouts, leaving more offcut than expected, often comes down to grain direction constraints or edge banding allowances not being set correctly in the software before the nest runs.
Dust extraction losing suction partway through a shift usually means a filter reaching capacity faster than the maintenance schedule assumes, particularly on shops running a lot of MDF, which generates finer dust than particleboard or ply. Keeping a simple fault log against tool changes, material batches and maintenance dates turns most of these from mysteries into five-minute diagnoses.
What design considerations does CNC cabinet work demand?
Designing for CNC production is different from designing for hand-built cabinetry, and the gap catches out shops making the switch for the first time.
Joinery has to be drawn with the machine’s capability in mind. Dowel and cam-lock systems, common in flat-pack production, rely on hole positions being accurate to a fraction of a millimetre, which is exactly where CNC drilling earns its keep over hand-marked layouts. Dado and rebate joints need router bit diameter accounted for in the design file, since a 6mm cutter can’t produce a perfectly square 5mm groove.
Tolerances need to be set deliberately rather than assumed. A cabinet carcass built from panels cut to a consistent ±0.2mm tolerance assembles cleanly; the same design with ±1mm variance across parts compounds into visible gaps by the time four panels meet at a corner. Software like TopSolid Wood, with its exact modelling approach, is built precisely to catch these compounding errors before they reach the machine.
Grain direction and sheet orientation matter for both structural integrity and appearance. Nesting software needs the correct grain constraint set for every part, or you’ll get panels that look wrong once assembled even though every cut was dimensionally perfect. Edge banding allowances, hardware clearance zones and hinge boring patterns should all be built into the design template once, then reused across every job, rather than re-specified from scratch each time.
Lessons from getting a cabinet shop onto CNC
Every shop that moves onto CNC learns the same handful of lessons, usually the hard way. Label everything, every part, every nest, before it leaves the machine bed, because a mix-up between two similar-looking panels costs more time to untangle than the labelling ever costs to set up. Verify tool offsets daily, not weekly, since a few thousandths of drift compounds fast across a full day’s nesting.
Commissioning should prioritise operator training on the software’s nesting logic before it touches spindle speeds or tool paths, because a confident nester who understands grain rules and clamping constraints prevents more waste than any machine setting. Schedule a dust extraction performance test shortly after commissioning, not just at handover, since real production loads reveal filter and ducting weaknesses that a demo run never will.
Local service and fast spare parts access matter more than most buyers weigh them at purchase time. A machine sitting idle for a week waiting on a seal or a belt costs far more in lost production than the price difference between suppliers ever suggested it would.
Get your cabinet shop machine-ready with Anderson Group Australia
There are suppliers offering cabinet CNC setups specified for various board mixes and volumes, not generic packages sold off brochures. Some manufacturers have built industrial CNC machinery for woodworking and panel processing, investing in ongoing R&D to keep machines running reliably in demanding production environments.

Where the software and workshop guidance above tells you what to look for, Anderson’s own Wood Machinery range gives you the hardware side of that specification, from flat-bed nesting routers through to production machining centres for higher-volume cabinet shops. Browse the full machines range to compare bed sizes, spindle specifications and automation options against the checklist covered earlier in this guide.
If you are planning a first CNC purchase or adding cabinet production capacity, contact Anderson Australia with your sheet sizes, materials, part mix and target output. Anderson Australia supplies machinery, servicing and spare parts; it does not provide subcontract cutting or machining. Ask which demonstrations and application checks are available for the machine you are considering.
Sources
FAQ
How much does a cabinet making CNC machine cost?
Machine pricing depends on working area, spindle and drilling configuration, material handling and the required production workflow. For kitchen and cabinet work, compare nesting and load/unload options against your sheet sizes and output targets. Contact Anderson Australia for a quotation based on the equipment and support you require.
Which CNC machine is best for cabinet making?
The right machine depends on your materials, part mix and production volume. Flat-bed nesting routers suit panel-based kitchen and cabinet work. Compare Genesis PLUS for nesting and automation, and the broader wood machinery range for other joinery operations.
How much do CNC cabinets cost?
Cabinet cost depends far more on design complexity, hardware and finishing than on the CNC process itself, since machining is one production step among several. Shops using nesting-first CNC workflows typically see material costs drop through improved sheet yield, which flows through to lower per-cabinet cost even before labour savings are counted.
What is the best CNC software for cabinetry?
It depends on shop size and complexity: Cabinet Vision suits integrated design-to-machine workflows at scale, CabMaster suits smaller workshops wanting fast, simple nesting, and TopSolid Wood suits shops doing complex or mixed-material assemblies needing exact modelling. The right choice comes down to confirmed post-processor support for your specific machine, not brand reputation alone.
How does CNC cabinet machining actually improve yield?
Nesting software arranges parts within each sheet while respecting grain direction, tooling and workholding constraints. Compare representative nests against your existing layout process to measure the actual change in sheet utilisation; no fixed percentage gain is guaranteed.