
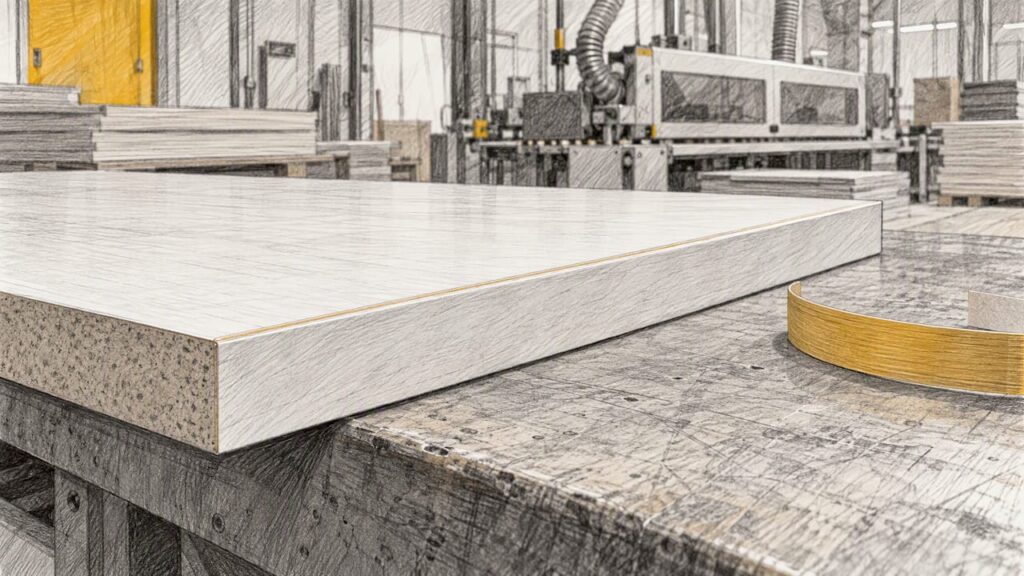
A visible glue line on a cabinet edge is almost always the result of four things: how clean and square the panel edge is, which adhesive you use, how the glue is applied (temperature, amount, feed speed), and how evenly the strip is pressed on. Fix those in that order and most dark or white lines disappear. If you still see a line on a high-gloss or contrasting edge, the remaining options are a thinner-line adhesive such as PUR, or a zero-joint edge system.
This guide is for cabinet makers, joinery shops and kitchen manufacturers running an edgebander on melamine, TFL, veneer or PVC-banded panels. It is about the glue line between the edge strip and the panel, not about glued timber joints or mitred frames.
TL;DR
- Start with the panel edge: a clean, square, chip-free edge matters more than any adhesive setting.
- PUR hot melt gives a much thinner, near-invisible glue line than EVA, and fusion (zero-joint) banding has no glue line at all.
- Cold panels, cold glue, too little adhesive, too slow a feed or too little roller pressure all lead to open joints or lifting edges.
- Keep squeeze-out under control with tape and a sharp scraper, and train new operators on scrap before they touch client work.
- Fix the cause on the machine rather than sanding the symptom away.
Table of Contents
- Why glue lines show up in the first place
- Step 1: Prepare the panel edge
- Step 2: Choose the right adhesive for the edge
- Step 3: Set temperature, glue amount, feed speed and pressure
- Step 4: Control squeeze-out and clean up without damaging the edge
- Step 5: Diagnose the line you can see
- Step 6: Train the operator and test on scrap
- When the process is right and the line still shows
- Where Anderson fits
- A short checklist for your shop
- FAQ
- Sources
Why glue lines show up in the first place
Edgebanding adhesive sits in a thin layer between the strip and the panel. The line is visible when that layer is thicker than it needs to be, when it is a different colour from the strip, or when tiny gaps let it show through. Three situations cause most complaints:
- A thick or uneven layer. Too much adhesive, or glue that has cooled before the strip is pressed on, leaves a ridge or a gap.
- An open joint. The strip does not sit tight to the panel, so the glue and the substrate colour show along the seam.
- Contrast. A pale adhesive behind a dark strip (or the reverse) makes even a good line obvious, especially under a kitchen’s downlights.
The cause decides the fix, so look at the defect closely before you change a setting. A continuous dark line along the whole edge points to adhesive and pressure. Random gaps and chips point to the panel edge. Lifting at the ends points to temperature, feed speed or end trimming.
Step 1: Prepare the panel edge
The glue can only be as thin as the gap you give it. A chipped, wavy or out-of-square edge forces the adhesive to fill the difference, and that is what you see afterwards.
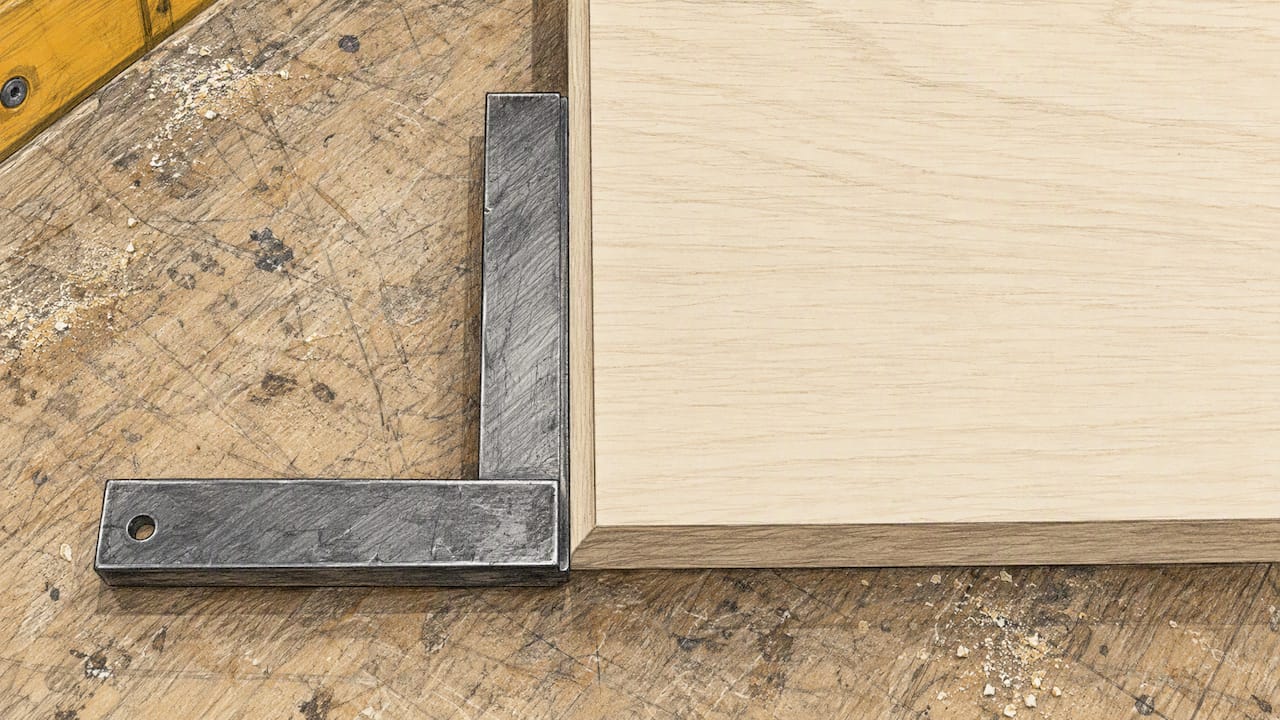
Check squareness. Misalignment between the panel edge and the application roller can cause chipping, and a precision square held to the edge will show whether the panel edge is perpendicular to the face. If it is not, the fix is at the saw or router that cut the panel, not at the edgebander.
Use pre-milling where you have it. Many shops buy an edgebander with a pre-mill unit because it can all but eliminate chipped edges left by panel sizing or nesting, and it can remove a score line set too deep. According to Woodworking Network, pre-milling can take off up to 3 mm, so you must compensate for the change in panel size. The same source advises checking pre-mill cutters for glue and resin build-up and wear if you still get chipping.
Mind where the panel came from. Panels cut on a CNC nesting router carry a different edge from panels cut on a beam saw or sliding table saw. Tool wear, hold-down and cut direction all show up at the edgebander. If you cut sheets on a router, our guide to nesting-first workflow for small cabinet shops explains how the sequence from nesting through to edgebanding fits together. If you are choosing between saws, see beam saw or sliding table saw for how each treats the edge.
Keep the edge clean. Dust and resin on the edge act like a second layer of glue. Extraction at the edgebander and a clean panel path keep the surface the adhesive meets consistent.
Step 2: Choose the right adhesive for the edge
The adhesive is the biggest single factor in how visible the line is.
| Adhesive | Typical application temperature | Glue line | Where it suits |
|---|---|---|---|
| EVA hot melt | 180 to 220°C | Visible, thicker line | Edges that are hidden or lightly used |
| PUR hot melt | 130 to 150°C | Much thinner, near-invisible | Visible, heavily handled, high-spec surfaces |
| Fusion / zero-joint banding | Strip activated (laser or hot air) | No separate glue line | Premium edges where no seam is acceptable |
The temperatures and the glue line behaviour above come from Elite Publishing’s edge banding feature, which notes that PUR hot melts launched in 1987 and that fusion banding has no glue line. Woodshop News describes a common split: lower-cost EVA where the edge will not be seen or heavily used, and PUR on aesthetically critical, more-handled surfaces.
In practice, that suggests a simple rule for a kitchen job:
- Doors, drawer fronts and visible end panels: PUR or a zero-joint system, with a strip colour matched to the face.
- Carcass interiors, shelf edges, back-of-house parts: EVA is a reasonable economy choice.
Colour matters as much as type. A neutral or colour-matched adhesive hides better behind white and light strips. For dark or high-gloss strips, a dark adhesive reduces contrast, and PUR in a matching tone narrows it further. Ask your adhesive supplier for the colour options in the chemistry you run, and test a short run on offcuts under your own shop lighting.
PUR also needs more care in the shop. It is moisture-curing, so follow the adhesive manufacturer’s data sheet for storage, pot life and cleaning, and check your machine is set up for the system you choose. If you are weighing up machine types and gluing systems, choosing an edgebander for an Australian cabinet shop walks through the five types.
Step 3: Set temperature, glue amount, feed speed and pressure
This is where most day-to-day glue line problems start. Woodworking Network’s troubleshooting guide lists the usual culprits: too little adhesive, a cold room, cold edgebanding or adhesive, too low a feed speed, or too little pressure from the application roller. Insufficient pressure or cold adhesive can leave the joint open.
Temperature of the room, panel and strip
A cold panel pulls heat out of the glue before the strip is pressed on. One adhesive producer’s technical guide gives 18 to 25°C for the substrate and strip as the optimal range for PUR, and says the initial set can slow below 15°C so the strip lifts before full adhesion. Treat that as a guide and defer to the data sheet for the adhesive you actually use.
In Australian shops this matters most on winter mornings and for panels delivered on a cold truck or stored near an open roller door. Let panels and strip rolls come to workshop temperature before you run them.
Amount of adhesive
The same technical guide lists a standard PUR application weight for PVC banding of 100 to 140 g/m², and says thicker banding or rough-textured substrates may need 140 to 180 g/m². Both too little and too much cause problems: starved glue leaves gaps, flooded glue leaves a fat line and a messy squeeze-out. Run a test piece, look at the glue line under magnification, and adjust in small steps. Your adhesive manufacturer’s data sheet is the reference for your product.
Feed speed and pressure
Slow feed lets the glue cool and skin over on the strip, so the strip meets a half-set film. Very fast feed can starve the joint. Pressure rollers must press the full height of the strip evenly: if only the top or bottom of the edge gets pressure, you will see an open seam on one side.
A quick check: run a strip on a scrap piece, stop mid-run if your machine allows, and look at the seam along the whole edge height. Compare it to a piece after the full pressure zone.
Machine condition
Worn or dirty rollers, a glue pot with charred adhesive, and a mis-set pressure zone all produce lines that look like adhesive problems but are really maintenance problems. A written routine helps: see edgebander maintenance from shift checks to quarterly care for a structure you can adapt to your own machine’s manual.
Step 4: Control squeeze-out and clean up without damaging the edge
Squeeze-out is not the glue line, but it creates the same complaint once someone scrapes it badly or sands through the surface.
- Tape the face. Wood Review suggests a line of green or blue tape along the edge to catch squeeze-out and make clean-up easier. This suits hand-applied or veneer edging where you cannot rely on a machine’s trimming and cleaning units.
- Scrape, do not sand first. A sharp carbide or steel scraper held at a controlled angle with light pressure can remove squeeze-out, and gently warming some adhesives eases removal, according to TruMatch’s trimming tool guide. A dull scraper gouges the strip or the face and creates a new defect.
- Trim after the bond sets. Cutting off excess before the adhesive has gripped can drag the strip and open the seam.
- Keep trimming units sharp and clean. Glue on the knives smears residue along the edge, which later reads as a line.
Sanding is the last resort. Fine sanding of a veneer or timber edge before finishing can remove faint glue shadows, but on melamine, TFL and PVC strips sanding takes off the decorative surface or the factory finish. If you find yourself sanding every edge, the cause is upstream.
Step 5: Diagnose the line you can see
Use the pattern of the defect to decide what to adjust first.
| What you see | Likely cause | Check first |
|---|---|---|
| Even dark or white line along the full seam | Adhesive colour or type, thick layer | Glue colour, PUR vs EVA, application amount |
| Gaps or open seam in patches | Panel edge condition, uneven pressure | Squareness, chipping, pressure rollers |
| Strip lifting, especially in cold weather | Cold panel, strip or glue; slow feed | Workshop temperature, glue temperature, feed speed |
| Glue smears and ridges on the face | Excess adhesive, dirty trim units | Glue amount, tape, scraper and knife condition |
| Chipped laminate beside the line | Dull pre-mill or saw tooling | Cutters, saw or router tooling, panel edge |
Change one variable at a time and write down what you changed. Otherwise you never learn which adjustment fixed it.
Step 6: Train the operator and test on scrap
Glue line quality depends on the person at the machine as much as the settings. Woodshop News recommends that new operators learn on scrap, and that a test run making shop storage cabinets is better than starting on client casework. Build that habit into onboarding: a standard test panel for each strip type, checked at the start of a shift and after any adhesive or strip change.
Safety belongs in the same conversation. Hot melt glue pots, trimming knives and rotating tools all carry risk. Follow the machine manufacturer’s manual and your state’s WHS requirements, and see edgebander safety and selection for Australian makers for the points to cover with operators.
When the process is right and the line still shows
Sometimes the shop has done everything correctly and the client still wants an invisible seam on gloss black or a pale timber-look. At that point, the choice is about equipment and materials rather than technique:
- Move visible parts to PUR with a matched adhesive colour.
- Consider a zero-joint or fusion-capable edgebander for premium lines. These systems bond the strip’s own functional layer to the panel, so there is no separate glue line, as the Elite Publishing feature notes.
- Use a thinner strip or a different strip finish on the most visible faces.
These options change the machine and the cost per metre, so decide them against your product mix, not just one difficult job.
Where Anderson fits
Anderson Group Australia supplies CNC machinery, servicing and parts to Australian cabinet, joinery, kitchen and furniture manufacturers. Our AFS models are edgebanders, while ATS machines handle nesting, routing and drilling, so a good edge starts with the right machine at each stage. We recommend machinery for your own production and we do not offer subcontract cutting or edgebanding. If edge quality is driving a machinery decision, look at our wood machinery range, then talk to us about your panels, strip types and volumes so we can confirm the exact model and configuration, including any pre-milling or gluing options, before you buy. You can start with our main site to request a quote.
If your edges come off a CNC router, our guide to fully automated nesting production lines shows how nesting, edgebanding and drilling link up, and CNC drilling versus manual drilling covers the step after the edge.
A short checklist for your shop
- Confirm panel edges are square, clean and free of chips before they reach the edgebander.
- Use pre-milling if your machine has it, and keep the cutters sharp and free of glue.
- Match adhesive type and colour to the visibility of the edge: PUR or zero-joint for visible parts.
- Bring panels, strip and glue to workshop temperature, and follow the data sheet for the adhesive.
- Test glue amount, feed speed and pressure on scrap, then record the settings.
- Tape, scrape and trim properly, and avoid sanding laminate or PVC edges.
- Train new operators on scrap and review a sample panel every shift.
FAQ
Can I sand out a glue line on melamine or PVC edging?
Not safely. Sanding removes the decorative surface or finish on melamine, TFL and PVC strips, so the repair becomes more visible than the line. Light sanding to remove glue shadows is more suited to veneer and timber edges before finishing. For laminated panels, remove squeeze-out with a sharp scraper and fix the cause at the machine.
Is PUR always better than EVA for hiding glue lines?
PUR produces a much thinner, near-invisible line, so it is usually the better choice for visible, heavily handled edges. EVA remains a common economical choice for hidden or lightly used edges. The right answer depends on where the part sits in the cabinet and what the client expects.
Why do my edges show glue lines only in winter?
Cold panels, strip and adhesive reduce the bond and can leave the joint open or let the strip lift. Let materials reach workshop temperature before running them, and check the adhesive data sheet for the recommended range. One technical guide puts the ideal range for PUR at 18 to 25°C.
How do I stop glue squeezing out onto the cabinet face?
Use the right amount of adhesive, keep pressure even, and keep trimming and cleaning units sharp. On hand-applied or veneer edging, a strip of green or blue tape along the edge catches squeeze-out. Remove residue with a sharp scraper at a controlled angle rather than sanding.
Sources
- Feature: Edge Banding, Elite Publishing
- Edgebanding basics, Woodshop News
- Edgebanding troubleshooting tips, Woodworking Network
- How to improve your edgebanding quality, Woodworking Network
- PUR Hot Melt Adhesive for Edge Banding: Technical Buyer’s Guide
- Edging veneered panels, Wood Review
- Edgebanding Trimming Tools, TruMatch