
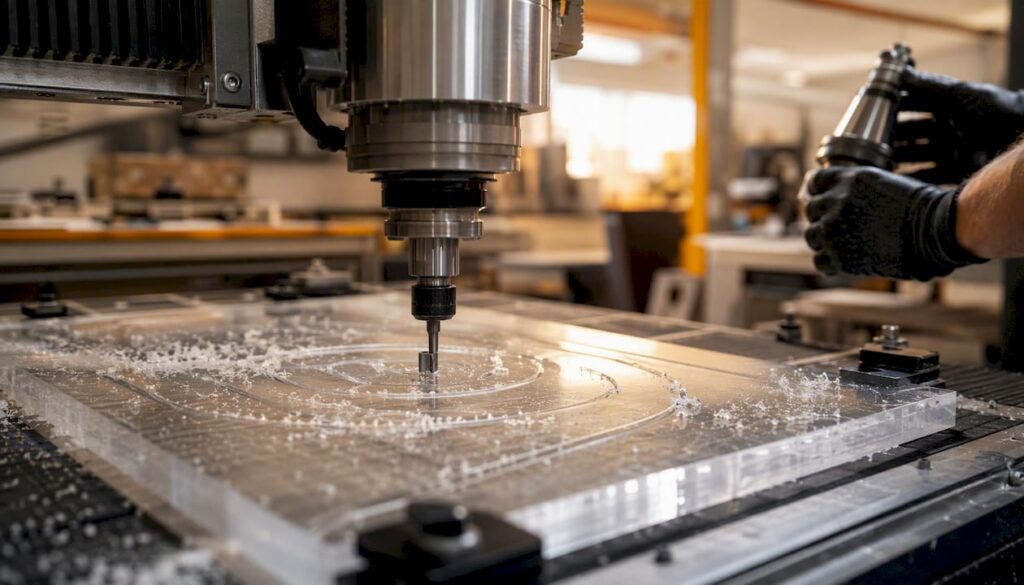
For acrylic machining, start with the sheet grade, thickness, part drawing and required edge finish. These determine which tooling, workholding and cutting trials to discuss with the supplier. Record whether the part needs an appearance finish or a specified dimensional tolerance, and assess a representative sample before selecting a production setup. A general cutter recommendation is not a guarantee of optical quality or tolerance.
Before you touch the spindle speed dial, lock in these three moves:
-
Choose cast acrylic over extruded for anything with tight tolerances, deep pockets, or engraving.
-
Fit a single-flute upcut (O‑flute) solid carbide bit, not a multi-flute metal end mill.
-
Cool with compressed air or cold air, and dial in chip load so you’re cutting curls, not powder.
Select tooling, cutting data and cooling from the material and tooling manufacturers’ guidance. Verify the proposed process on the actual acrylic grade rather than applying a blanket rule against liquid cooling.
Key Takeaways
Acrylic CNC machining succeeds when cast material, a single O‑flute solid carbide cutter, and correctly calculated chip load work together to keep the cutter slicing instead of melting.
| Point | Details |
|---|---|
| Material choice comes first | Choose cast acrylic for tight tolerances and polishing; reserve extruded for simple, low-spec cuts. |
| Tooling drives heat control | A single O‑flute solid carbide bit clears chips and prevents the gumming multi-flute cutters cause. |
| Chip load beats guesswork | Calculate feed ÷ (RPM × flutes) and adjust until chips curl cleanly rather than turning to dust. |
| Design and fixturing prevent cracking | Use generous inside radii, correctly sized tabs, and a properly sealed vacuum table to avoid stress failures. |
| Scale up with the right machine | Anderson’s 5-axis and enclosed CNC platforms suit acrylic runs needing repeatable, tight-tolerance production. |
Table of Contents
-
What is acrylic (PMMA) and which type suits acrylic CNC machining?
-
How do you get a glass-clear finish on machined acrylic edges?
What is acrylic (PMMA) and which type suits acrylic CNC machining?
Acrylic is the common name for polymethyl methacrylate (PMMA), a rigid, optically clear thermoplastic prized for its clarity, UV stability, and glass-like finish. Machining behaviour depends almost entirely on how the sheet was made, so this is where material selection either saves your job or ruins it before you’ve cut a single pocket.
Cast acrylic is poured into moulds and cured slowly, which leaves it with low internal stress. It machines cleanly, tolerates deeper cuts, and takes a polish well. Extruded acrylic is pushed through a die under heat and pressure, which locks in internal stress that shows up later as crazing, warping, or gumming at the cutter. Extruded sheet does hold tighter thickness tolerance off the roll and costs less, which is why it’s common in low-spec signage and glazing. For CNC work specifically, cast acrylic machines cleaner and holds tighter tolerances, while extruded tends to gum and melt at higher speeds and suits laser cutting or simple straight cuts better than aggressive milling.
A quick material checklist before you order stock:
-
Insist on cast acrylic for engraving, deep pockets, polished edges, or anything load-bearing.
-
Extruded is acceptable for flat-cut signage, simple outlines, or parts that get laser-finished anyway.
-
Ask your supplier directly. Cast and extruded sheets often look identical until you’re three passes into a pocket and the chips turn to smoke.
-
If in doubt, run a scrap offcut through your actual toolpath before committing good material.
Choosing acrylic grade, thickness and prep before you cut
Not every acrylic sheet is built for the same job, and matching grade to application saves you from re-cutting a part that looks fine until someone inspects the edge under light.
Grade and optical spec. Optical-grade cast acrylic (used for lenses, light pipes, and display windows) demands tighter tolerance control and a cleaner finish than structural or fabrication-grade sheet. If your part needs to stay transparent under scrutiny, spec accordingly, because the extra cost of optical grade is cheaper than remaking a part that clouds after machining.
Thickness guidelines. Standard sheet runs from around 1.5mm up to 50mm or more, but past roughly 25mm, laminating two or three thinner sheets with acrylic cement is often more practical than trying to core out a solid block. Laminated stacks also machine more predictably because you’re not fighting a single mass of stored heat.
Pre-machining checks, in order:
-
Confirm cast versus extruded with your supplier’s paperwork. Don’t guess by feel.
-
Check the sheet for flatness and warp on a flat table before it goes on the vacuum bed.
-
Peel the protective film only immediately before cutting; leaving it on protects the surface but can gum the cutter if left under the toolpath.
-
If the sheet has come from a hot warehouse or been freshly cast, let it condition at shop temperature for 24 to 48 hours. This reduces the residual stress that shows up as post-cut warping, a step supported by standard annealing and stress-relief principles) used across thermoplastic fabrication.
Skip the conditioning step on a big optical panel and you’ll sometimes watch it bow on the bench a day after machining, for no reason anyone in the shop did wrong.
Which tooling works best for CNC routing acrylic?
Cutter choice is the single biggest lever you have over heat and chip control, and it’s where most people machining acrylic for the first time get it wrong because they reach for whatever end mill is already in the toolholder.
Single O‑flute solid carbide bits win, and here’s why. A one-flute upcut geometry has a big open flute path that lets chips curl up and clear the cut immediately. Multi-flute metal end mills, designed for aluminium or steel, pack chips into the flute valleys, and in acrylic that packed material re-melts against the hot cutter and re-welds itself to the part edge. The manufacturer routing guidance from ACRYLITE recommends one to three flutes with up-spiral O‑flute preferred, and notes that the flute geometry itself acts almost like a built-in heat sink, letting each curling chip carry heat away from the cut rather than leaving it to build up in the material.
When to use other geometries:
-
Compression bits (upcut lower, downcut upper) suit double-sided finish work where you need a clean top and bottom edge on thin sheet with no fuzz.
-
Straight flute cutters work for slow, controlled slotting where finish matters more than speed.
-
Down-spiral geometry helps hold thin stock flat by pushing chips (and the sheet) down onto the spoilboard instead of lifting it, useful on sheet under 3mm where vacuum alone won’t hold it.
Cutter diameter guidance for common tasks:
-
1/8″ (3.175mm) for detail work, tight internal radii, and engraving.
-
1/4″ (6mm) is the workhorse size for profiling, pocketing, and most sheet up to 12mm.
-
Step up flute count only for finish passes, once roughing has already cleared the bulk of the material and heat isn’t the main risk.
Tool handling matters as much as tool choice. A worn collet lets the cutter run out even slightly, and that tiny wobble is enough to generate localised friction heat that a sharp new bit wouldn’t. Check collet condition every job, match shank diameter exactly to your collet size (never “close enough”), and retire a bit the moment you see built-up melted plastic on the flutes rather than clean curls. A dull edge doesn’t cut acrylic, it rubs it, and rubbing is what turns a clean pocket into a smoked one.
Pro Tip: Before running a production job, cut a short test slot in scrap and pull the chip out with tweezers. If it’s a tight, pale curl, your parameters are right. If it’s dust, powder, or a melted string, stop and adjust before you touch the real part.
What feed rate and chip load should you use for acrylic?
Chip load is the one number that determines whether you get clean curls or a smoking mess, and it’s calculated the same way regardless of machine brand: feed rate ÷ (spindle RPM × number of flutes) = chip load per tooth.
The rule that matters more than any single number on a spec sheet is simple: make chips, not dust. Acrylic has a relatively low melting point compared with metals, so if your chip load is too light for the RPM you’re running, the cutter isn’t slicing material away cleanly. It’s rubbing and generating friction heat, and that heat softens the acrylic just enough to re-weld itself to the cutter and the cut wall. That’s the gummy build-up every acrylic machinist has fought at least once.
Sample starting parameters for common single O‑flute solid carbide cutters, based on manufacturer routing data and shop-tested figures:
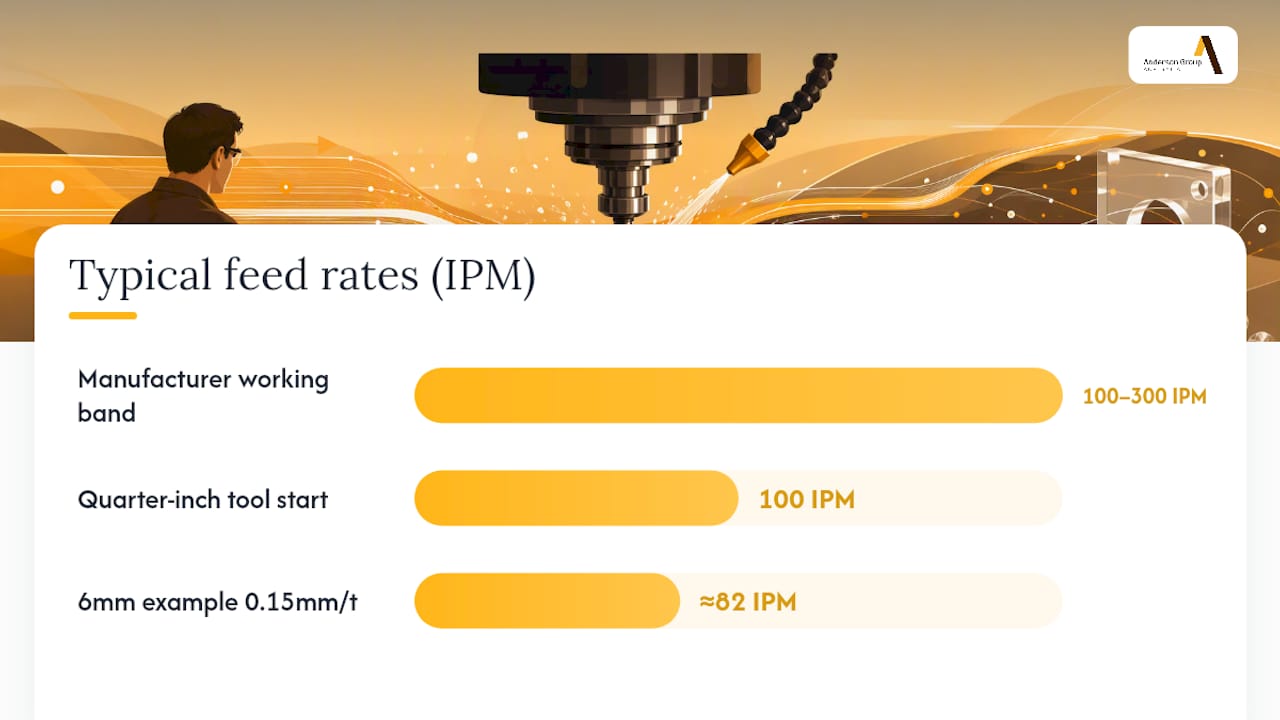
These ranges echo the manufacturer’s fabrication manual for premium acrylic sheet, which lists 16,000 to 18,000 RPM and 100 to 300 IPM as the working band across common bit sizes, and a separate practical shop guide that pegs a quarter-inch tool at roughly 18,000 RPM and 100 IPM as a reliable starting point before you fine-tune by ear.
Worked example. Take a 6mm single-flute cutter running at 14,000 RPM. If you want a chip load around 0.15mm per tooth, rearrange the formula: feed rate = chip load × RPM × flutes = 0.15 × 14,000 × 1 = 2,100mm/min, or roughly 82 IPM. Push the RPM to 18,000 at the same feed and your chip load drops, which is exactly the setup that produces dust instead of curls. That’s why “just increase RPM” is the wrong instinct almost every time someone’s cut is smoking.
To dial in the rest of the toolpath:
-
Set your roughing stepdown at 30 to 50% of cutter diameter for the first passes, dropping to a lighter finish pass of 0.5 to 1mm for the final wall.
-
Ramp or helix into pockets rather than plunging straight down. A straight plunge has nowhere for the chip to escape and builds heat fast at the tip.
-
Keep tool engagement under roughly 50% of cutter diameter on the sides, dropping it further on thin-wall sections where flex and heat both spike.
-
If you hear a change in pitch or see stringy chips, drop RPM slightly or bump feed. Don’t do both at once, or you’ll lose track of which change fixed it.
Choose cooling for the particular acrylic and operation. Röhm’s PLEXIGLAS machining guidance includes suitable cooling lubricants or compatible emulsions for specified drilling work, so a blanket prohibition on liquid cooling is incorrect. Confirm compatibility and machine suitability before use.
How should you design parts for acrylic CNC machining?
Good CAD work prevents most cracking problems before the file ever reaches the machine, and the rules here are specific enough to build into a design checklist rather than vague advice about “keeping things simple.”
Inside radii should never be smaller than your cutter radius, obviously, but for acrylic specifically, aim for inside corner radii at least 1.5 times the cutter diameter wherever the part allows it. Sharp internal corners concentrate stress exactly where cracks start to propagate.
Wall thickness below about 2mm becomes fragile in acrylic regardless of cutting quality, and thin ribs or fins under 3mm are prone to snapping from vibration alone, not just from an aggressive toolpath. If your design calls for a thin feature, plan to cut it last, once surrounding material has stopped supporting vibration elsewhere in the part.
Tabs and bridges hold parts in place during through-cuts so they don’t lift, shift, or fall through the spoilboard mid-job. For acrylic, keep tabs small (roughly 3 to 5mm wide) and place them on straight edges rather than curves, where a tab is harder to clean up afterwards without leaving a visible nub.
Toolpath strategy matters as much as the model itself:
-
Rough first with a larger stepover to clear bulk material fast, then switch to a finishing pass at a lighter stepdown for the visible edge.
-
Favour climb cutting for the finish pass on acrylic. It tends to leave a cleaner edge than conventional cutting because the cutter is pulling away from the cut chips rather than pushing back into them, reducing the re-melt risk on the final surface.
-
Select an entry strategy suited to the tool, acrylic grade and operation. Confirm whether ramping, helical entry or drilling is appropriate from the tooling guidance.
-
Set stepover on finishing passes to roughly 10 to 15% of cutter diameter if surface finish matters, accepting the longer cycle time as the cost of a smoother wall.
How do you fix acrylic to the table without cracking it?
Workholding for acrylic sits on a knife edge: hold it too loosely and it lifts or chatters mid-cut; clamp it too aggressively and you crack the sheet before the spindle even starts.
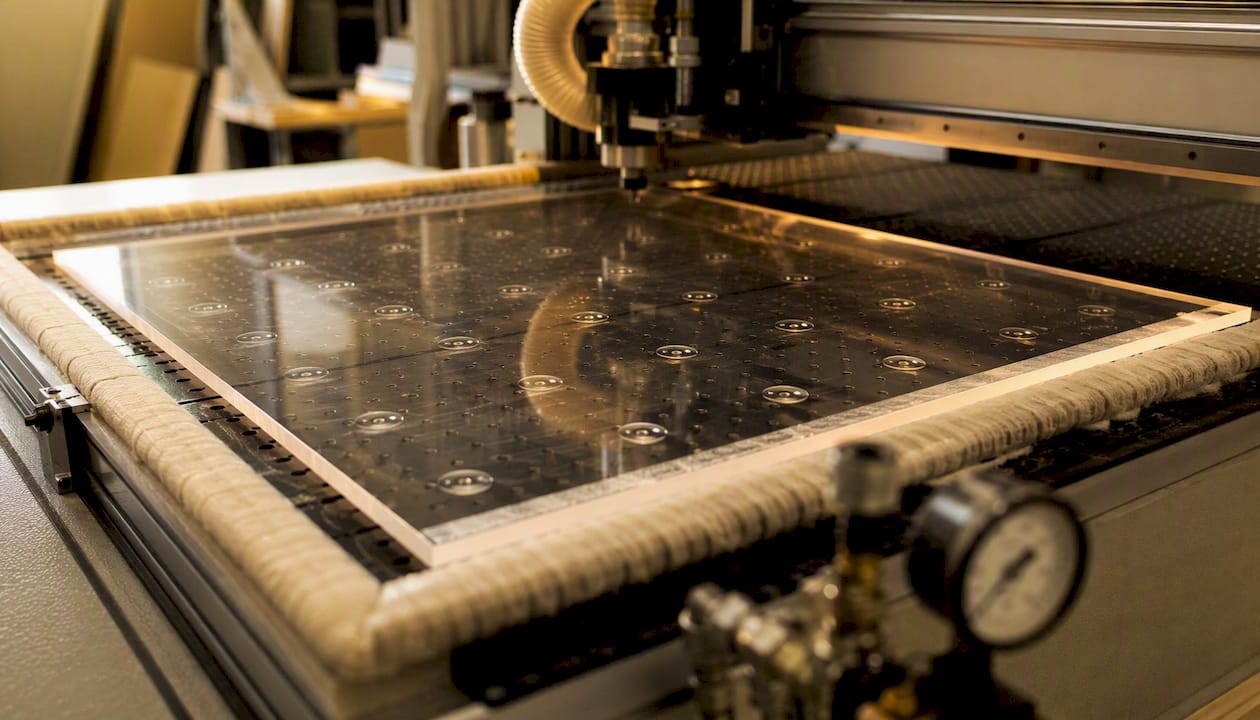
Vacuum tables are the standard for sheet work because they hold the full surface evenly without point-loading any single spot. The catch is that vacuum only works if the sheet seals properly. Warped stock, undersized zones, or a leaking gasket will let a sheet lift mid-cut, so always check vacuum pressure on a dry run before committing to the actual job.
Low-tack tape and double-sided tape work well for smaller parts or where vacuum coverage is patchy, particularly around cutouts where vacuum zones lose their seal. Sacrificial spoilboard underneath protects your machine bed and gives screws or clamps somewhere to bite for parts too small or oddly shaped for reliable vacuum hold. Mechanical clamps suit thick, rigid stock but need padding wherever they touch acrylic directly, since bare metal jaws under clamp pressure are a surprisingly common crack point nobody expects until it happens.
For chip evacuation on the vacuum table itself, position your air nozzle to blow chips away from the cutting zone rather than back into it, and angle it slightly ahead of the cutter’s direction of travel so it clears the path before the bit arrives. On production runs, dust extraction paired with a cold-air line beats a single air nozzle for consistency, because it pulls fine particulate away instead of just redirecting it around the table.
A cutting strategy checklist worth pinning above the machine:
-
Run multiple shallow passes rather than one deep pass, especially on anything thicker than 10mm.
-
Match tool selection to the operation. A slotting cutter isn’t the right choice for a finishing pass, and vice versa.
-
Never let the tool dwell in one spot, even for a second, since a stationary spinning cutter in acrylic generates heat fast enough to visibly discolour the material.
Pro Tip: If you’re vacuum-holding thin sheet under 3mm, add small tabs even when vacuum feels secure. A single unexpected air leak on a thin panel can lift the whole piece into a spinning cutter in under a second.
How do you get a glass-clear finish on machined acrylic edges?
A raw milled edge on acrylic comes out frosted, not clear, because the cutter leaves fine tool marks that scatter light. Getting to a glass-clear finish takes one of three routes, each suited to different volumes and budgets.
-
Mechanical sanding and buffing is the most accessible route for hobbyists and low-volume shops. Work through grit progressively, typically starting around 400, moving to 600, then 1000, then a buffing wheel with plastic polish compound. It’s slow and requires patience at each grit stage, but needs no special equipment beyond what most workshops already have.
-
Flame polishing passes a small flame quickly along the edge, melting the surface just enough to reflow and smooth the tool marks. It’s fast and gives a genuinely glass-like result on straight edges, but it takes practice. Too slow a pass and you’ll distort the edge or introduce bubbles.
-
Solvent (vapour) polishing exposes the edge to solvent vapour, commonly dichloromethane, which dissolves a microscopic surface layer and lets it reflow smooth. It gives excellent results on complex or curved edges that flame polishing struggles to reach evenly.
Solvent polishing carries real safety weight that shouldn’t get glossed over. Dichloromethane is toxic and tightly regulated, and vapour polishing must happen in a well-ventilated space or under an extraction hood, with appropriate respiratory PPE and gloves. Flame polishing needs its own precautions too: proper ventilation for combustion fumes, eye protection, and a fire-safe work area clear of offcuts and dust, which is flammable in quantity. Neither method belongs on an open bench with no airflow, regardless of how quick the job seems.
Why does acrylic crack, craze or melt when machining?
Every acrylic machining problem traces back to one of a handful of root causes, and matching the symptom to the cause saves hours of guesswork.
Investigate melting or gumming by checking tooling condition, chip evacuation, cutting data, workholding and cooling against the approved process. Change parameters through a controlled trial rather than applying a universal feed or speed adjustment.
Chipping on the top or bottom edge usually points to a blunt cutter, excessive stepdown, or the wrong flute geometry for the operation. Down-spiral geometry helps on the exit side; a fresh, sharp cutter fixes most of the rest.
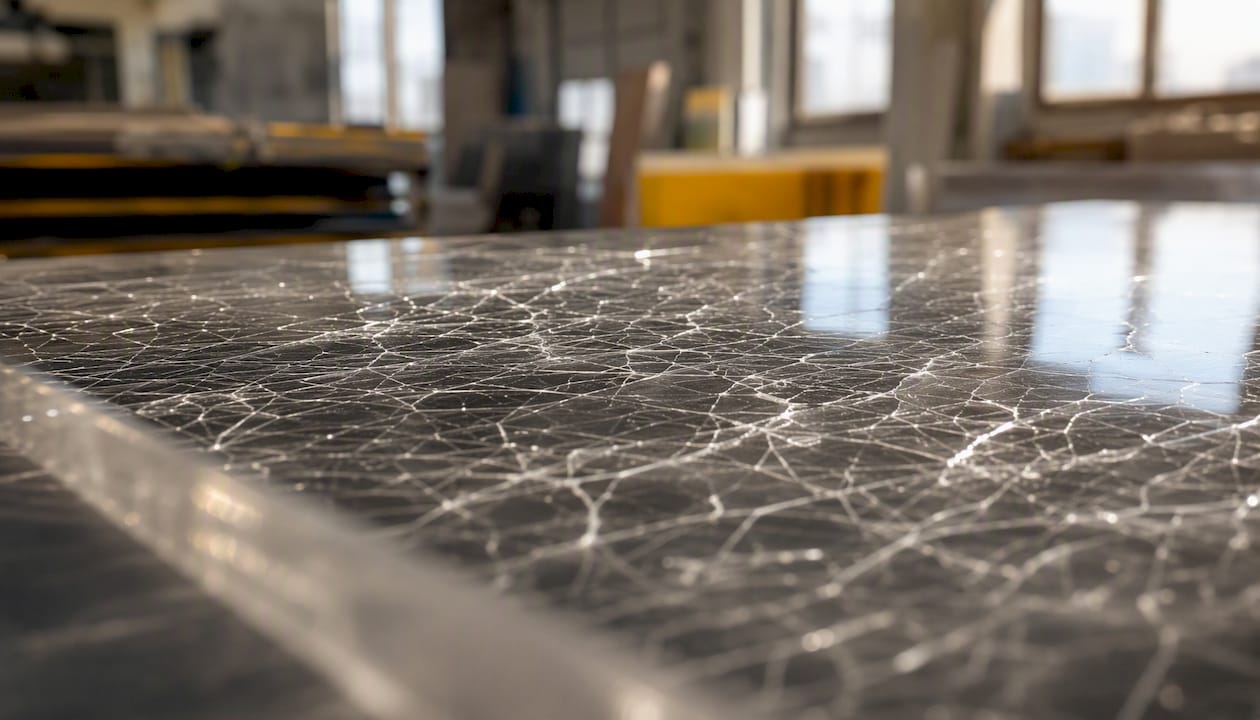
Crazing can reflect material stress, chemical compatibility or processing conditions. Obtain grade-specific guidance on diagnosis and any stress-relief treatment; leaving sheet at room temperature for a fixed period does not establish that residual stress has been relieved.
Clouded or frosted edges are simply the natural result of tool marks scattering light, not a machining fault. That’s a finishing problem, not a cutting one, solved with sanding, flame polishing, or solvent polishing.
Tool breakage mid-cut typically means excessive engagement, a dull edge being forced through material it can no longer slice cleanly, or feed rates set well outside the ranges above.
Quick verification before you commit to a full production run:
-
Check chip shape: tight curls are good, dust or melted strings mean stop and adjust.
-
Listen to the cut. A steady, even tone is right; a screaming pitch or a dull grinding sound both signal a problem.
-
Run a test grid across a range of feeds and speeds on scrap stock, and record the parameters that produce clean chips so you’re not re-deriving them every job.
What CNC machine features matter for acrylic production?
Hobby routers can produce excellent one-off parts, but production runs of acrylic components put different demands on the machine itself, and the features that matter aren’t always the ones people expect.
Spindle rigidity and speed range matter more than raw RPM ceiling. A rigid spindle that holds a steady 16,000 to 18,000 RPM without deflection under load gives more consistent chip formation than a high-RPM spindle that flexes slightly under side load. Collet quality directly affects runout, and even a small amount of wobble generates the friction heat that causes gumming, regardless of how well you’ve calculated feed and speed. Vacuum table capability across full sheet size, not just partial zones, matters for anyone running full 4×8 sheets rather than small offcuts.
For shops scaling beyond prototyping, automatic tool changers let you rough with one cutter and finish with another without stopping to swap by hand, which matters when you’re running dozens of panels a day rather than one. Enclosure and integrated dust extraction keep fine acrylic dust, which is a genuine respiratory and fire hazard in volume, contained rather than drifting through the shop.
Machines like Anderson’s AXXIOM 5-axis series handle the kind of complex acrylic geometry (compound angles, undercuts, contoured optical panels) that a 3-axis router simply can’t reach in one setup, while enclosed platforms such as the MASS‑B pair dust containment with the rigidity that keeps chip load consistent across a full production shift. That consistency is what separates a one-off prototype from a repeatable production run: standard CNC tolerances for acrylic sit around ±0.05mm, but high-precision setups with cast acrylic can push down to roughly ±0.005mm on critical features, a level only reliably achievable on rigid, well-tuned industrial platforms rather than light-duty routers.
Should you machine acrylic, polycarbonate or PETG?
Acrylic wins on optical clarity and polishability. Nothing else in the common plastics lineup takes a flame or solvent polish to true glass clarity the way cast acrylic does, and it holds UV stability far better than most alternatives when used outdoors. What it loses is impact resistance: acrylic chips and cracks under shock loads where polycarbonate simply flexes and survives.
Polycarbonate beats acrylic on impact strength by a wide margin, making it the better choice for machine guards, protective screens, or anything that might take a hit. It costs more, machines with more heat resistance, but never reaches the same optical clarity after machining without extra finishing steps. PETG sits in between: tougher than acrylic, easier to machine than polycarbonate, but rarely matches acrylic’s clarity or surface finish straight off the cutter.
Choose acrylic for optical windows, light pipes, signage, and display cases where appearance and clarity carry the design. Choose polycarbonate or PETG where the part faces impact, high heat, or repeated flexing that acrylic simply won’t survive.
Author’s practical notes from the workshop
The single habit that saves the most scrap isn’t a formula, it’s a checklist taped to the machine: confirm cast versus extruded, check collet runout, and dry-run the vacuum seal before the spindle spins up. Most cracked parts trace back to skipping one of those three, not to a bad calculation.
Always run a test grid on scrap before a production batch, and actually write down the parameters that worked. It sounds obvious, but the shops that skip this step are the ones re-deriving feeds and speeds from scratch every single job.
Ready to move from prototypes to production runs?
Everything above works on a hobby router or a light-duty CNC, right up until you need to run the same tight-tolerance acrylic part fifty times a day without babysitting every pass. That’s the point where an industrial machining centre earns its keep: rigid spindles that hold speed under load, full-sheet vacuum tables, automatic tool changers for rough-and-finish swaps without manual intervention, and enclosed dust collection that keeps fine acrylic particulate out of the shop air.

Anderson builds machines around exactly this gap between prototyping and repeatable production. The AXXIOM 5-axis series handles complex acrylic geometry in a single setup, the enclosed MASS‑B pairs automation with dust containment for continuous runs, and the broader CNC machinery range covers everything from vertical machining centres to production platforms with automatic pallet changers for shops scaling well beyond one-off parts. If you’re weighing up whether your current setup can hold ±0.005mm across a full production run, talk to Anderson about what machine actually fits your acrylic workload.
Frequently asked questions about acrylic CNC machining
Acrylic can be CNC machined when the material, tooling, workholding and process are suitable. Investigate cracking against the material supplier’s guidance and validate changes on representative material.
What spindle speed should I use for acrylic on a CNC router? Most single O‑flute solid carbide cutters run well between 14,000 and 18,000 RPM, adjusted against your feed rate to keep chip load in the “clean curl” range rather than producing dust.
Why does my acrylic melt while cutting? Melting means your chip load is too light for the RPM in use, or you’re running a multi-flute cutter that packs chips instead of clearing them. Increase feed rate, drop RPM slightly, or switch cutter geometry.
Is cast or extruded acrylic better for CNC routing acrylic projects? Cast acrylic is the better default for CNC work because of lower internal stress and cleaner machining behaviour. Extruded suits simple, low-tolerance cuts or laser work rather than aggressive milling.
Does the same feed and speed approach work for CNC machining polycarbonate or CNC machining HDPE? The core principle (make chips, not dust, and manage heat with air cooling) applies broadly across plastic machining, but polycarbonate and HDPE tolerate different RPM and feed ranges than acrylic. Treat each material’s parameters separately rather than reusing acrylic settings.