
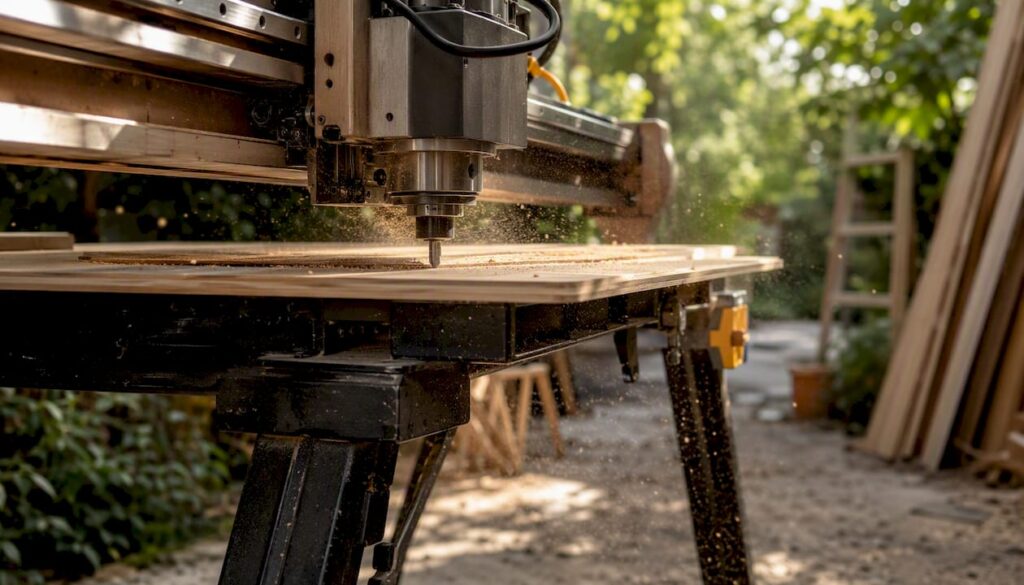
For most Australian furniture makers, a bed-sized nesting router with a 4’×8’ working area and solid CAM integration delivers the best balance of flexibility, cost, and throughput. Whether you run a small custom shop or a mid-sized panel operation, that combination handles the bulk of what furniture production demands: sheet goods, cabinet carcasses, door profiles, and flat-pack components.
-
Buy when: your manual cutting and routing labour costs exceed what a machine payment would cost, or when rework and inconsistency are eating into margins.
-
Best fit by shop size: a 3-axis nesting router suits small-to-medium custom workshops; a panel processing centre or multi-function machining centre suits factories running high-mix, high-volume panel furniture.
-
Immediate next step: request a demo cut on your own parts and ask for a spec sheet that includes spindle power, repeatability, and local service coverage.
Anderson Group Australia supplies nesting routers, 5-axis machining centres, and panel processing equipment to furniture manufacturers across Australia with local commissioning and support.
Pro Tip: Before you attend any demo, bring a sample part that represents your hardest job, not your easiest. A machine that handles your worst-case material and geometry without hesitation is the one worth buying.
Key takeaways
A nesting router with CAM integration is the highest-ROI first CNC investment for most Australian furniture manufacturers, with batch-size-one capability and labour savings delivering payback within two to four years at typical production volumes.
| Point | Details |
|---|---|
| Best first machine for most shops | A 3-axis nesting router with a 4’×8’ bed and 12+ position tool changer covers the majority of panel furniture work. |
| Spec the tool changer properly | A minimum of 12 tool positions avoids manual mid-job swaps that kill throughput on production runs. |
| Budget beyond the machine price | Allow 10–15% of purchase price for tooling, training, and consumables in year one to reach full productivity. |
| Implementation takes 4–6 months | From purchase to full production capacity, allow four to six months including installation, training, and workflow integration. |
| Anderson as your Australian supplier | Anderson supplies nesting routers, 5-axis centres, and panel processing equipment with local commissioning and service support across Australia. |
Table of Contents
-
What does CNC machining actually do in furniture production?
-
What types of CNC machines are used in furniture manufacturing?
-
How do you choose the right CNC machine for your furniture shop?
-
What does a furniture CNC machine cost in Australia, and what is the ROI?
-
How does a CNC furniture production workflow run from start to finish?
-
What materials and tooling do you need for furniture CNC work?
-
Maintenance, safety, and Australian compliance for CNC furniture shops
-
Why is automation and batch-size-one production reshaping furniture manufacturing?
-
How long does it take to integrate CNC machining into a furniture workflow in Australia?
-
Anderson Group Australia: CNC equipment and support for furniture manufacturers
What does CNC machining actually do in furniture production?
CNC routing moves cutting tools in 2–5 axes using digital instructions, making it the primary method for cutting, shaping, and engraving furniture components with the kind of repeatability that manual routing simply cannot match. The term “CNC” stands for Computer Numerical Control, and in a furniture context it refers to any machine that reads a digital file and executes precise toolpaths on wood, MDF, plywood, or composite panels.
The core operations you will use day to day are:
-
Routing and profiling: cutting profiles, rebates, grooves, and decorative edges on cabinet doors, drawer fronts, and panel edges.
-
Nesting: arranging multiple parts on a single sheet to maximise material yield before cutting, which is where the real cost savings show up in panel furniture.
-
Drilling and boring: placing dowel holes, confirmat holes, shelf-pin holes, and hinge-cup bores with consistent spacing across every panel.
-
3D profiling (3/5-axis): shaping chair legs, sculptural cabinet feet, curved headboards, and organic forms that would take hours by hand.
The production flow from idea to finished part follows a consistent sequence:
-
CAD model preparation — draw or import the part geometry in a CAD package.
-
CAM and nesting — assign toolpaths, set feeds and speeds, and nest parts for sheet yield.
-
Machine setup — load material, confirm hold-down, load tools, and run a datum check.
-
Machining — the machine executes the file; the operator monitors and manages tool changes.
-
QA and finishing — check dimensions, sand or edge-band as required, and pass to assembly.
Three parts illustrate what this looks like in practice. A flat cabinet side panel is nested with five other parts on a 2400×1200 mm MDF sheet, routed to size, and drilled for shelf pins in a single setup. A decorative shaker-style door gets a rebate and profile routed in one pass. A tapered chair leg is 3D-profiled on a 4-axis or 5-axis router, something that would require a lathe and hand finishing otherwise.
The accuracy gains are significant. Where hand routing introduces variation of a millimetre or more between parts, a well-maintained CNC router holds tolerances that keep cabinet carcasses square and flat-pack assemblies fitting first time.
What types of CNC machines are used in furniture manufacturing?
Not every machine suits every shop. The choice comes down to your part mix, your volume, and how much floor space and capital you can commit.
Nesting routers (bed routers)
The workhorse of panel furniture production. A nesting router takes a full sheet of MDF, plywood, or melamine board and cuts all the parts for one or more cabinets in a single run. The vacuum table holds the sheet flat; the CAM software has already arranged the parts for maximum yield. Most shops start here, and many never need anything else. A standard 4’×8’ (1220×2440 mm) bed handles the most common sheet sizes; larger 5’×10’ beds suit production shops running full-size panels.
Panel processing centres (six-side machining)
These machines process all six faces of a panel component, drilling, routing, and milling in one automated cycle. Double-station six-side centres can process two panels simultaneously and achieve positioning accuracy around ±0.05 mm, which is the kind of precision that makes flat-pack assembly genuinely reliable at scale. They suit factories running high-mix cabinet lines where every panel needs hardware holes on multiple faces.
3-axis and 5-axis routers
A 3-axis router moves in X, Y, and Z — sufficient for flat panel work, profiling, and most furniture routing tasks. A 4-axis machine adds a rotary axis for indexed work on shaped legs and curved rails. A 5-axis router adds continuous tilting and rotation, enabling undercuts, compound angles, and complex sculptural forms that 3-axis machines cannot reach in a single setup.
Multi-function machining centres
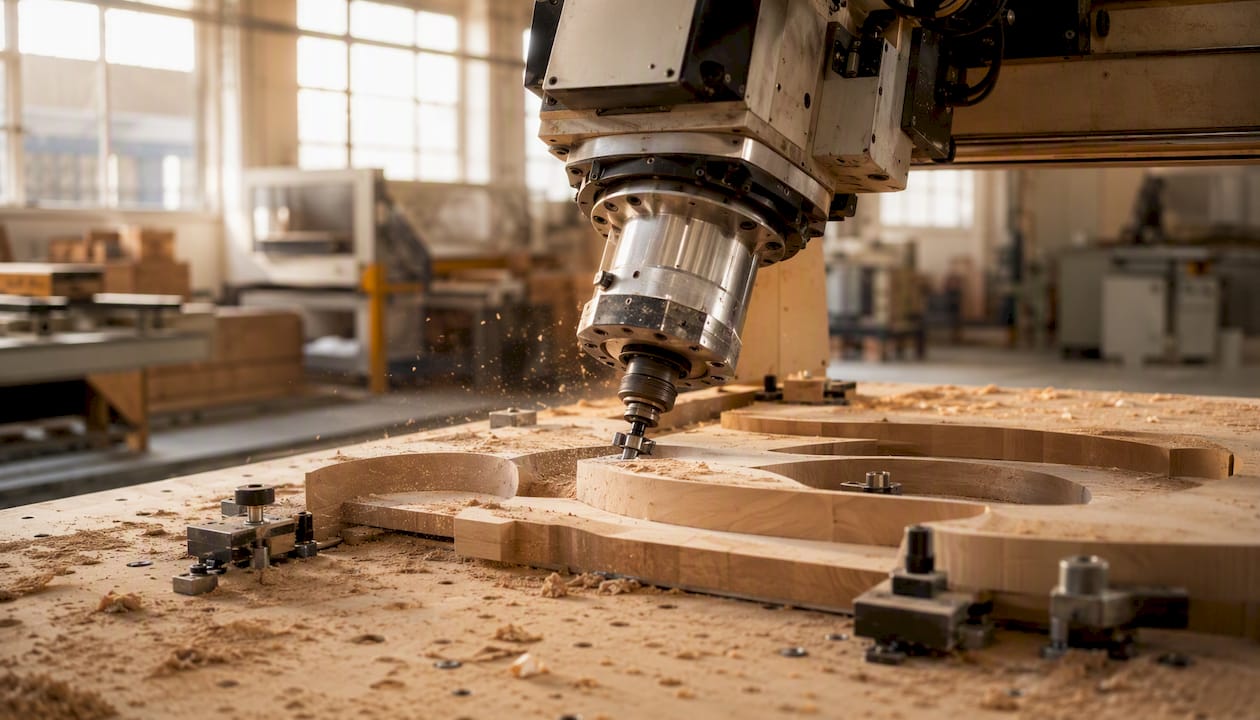
Multi-function centres combine cutting, drilling, profiling, and automatic tool changing in one machine, replacing several standalone machines and enabling unmanned production shifts. They suit contract manufacturers and larger factories where floor space is at a premium and labour costs are high.
Technical specification checklist
Use-case summary:
-
Small custom shop (1–5 staff): 3-axis nesting router, 4’×8’ bed, 8-position tool changer.
-
Mid-sized panel producer (5–20 staff): 3-axis nesting router plus a six-side drilling centre.
-
High-mix contract manufacturer: Multi-function centre or 5-axis router with auto tool changer and barcode job call-up.
Pro Tip: For furniture work, a 12-position tool changer is the practical minimum if you want to run a full job — profile bit, nesting bit, drilling bit, V-groove, and a spare — without stopping to swap tools manually. Shops that underspec the tool changer end up with an operator standing at the machine for half the shift.
How do you choose the right CNC machine for your furniture shop?
Start with your production goals, not the machine spec sheet. The spec sheet tells you what a machine can do; your production goals tell you what it needs to do for your business.
Decision checklist
-
Define your part mix. Are you cutting flat panels only, or do you need 3D profiling for legs, curved parts, and decorative elements?
-
Estimate your volume. How many sheets per day or week do you need to process? A machine that runs 4 hours a day is undersized for a growing shop.
-
Assess your material range. MDF, plywood, hardwood, melamine, and composites each have different tooling and hold-down requirements.
-
Measure your floor space. A 5’×10’ nesting router needs clearance on all four sides for sheet loading and offloading.
-
Set a realistic budget. Include the machine, installation, dust extraction, CAM software, tooling, and training — not just the purchase price.
-
Decide your automation level. Manual sheet loading suits small shops; auto-loading and barcode job call-up suit factories running 8+ hours a day.
Technical questions to ask at a demo
-
What is the actual cutting area versus the advertised bed size?
-
What spindle brand and bearing type is fitted, and what is the service interval?
-
How many tool positions does the changer hold, and what is the tool change time?
-
What CAM software is supported, and does the post-processor come pre-configured for furniture nesting?
-
What is the local spare-parts lead time for wear items (spindle, vacuum pump, drive belts)?
-
What does the commissioning process include, and how many days of on-site training are provided?
-
What is the warranty scope, and is there a local service technician within your state?
Red flags to watch for
-
No local spare-parts inventory and a lead time of more than four weeks for common wear items.
-
A control system with no English-language documentation or no local support network.
-
A vendor who cannot provide a reference site in Australia running the same machine model.
-
Used machines with no service history, unknown spindle hours, or a missing electrical compliance certificate.
Pro Tip: Ask the vendor to run your actual part file during the demo, not a showroom sample. Then measure the output with your own vernier callipers. If the machine cannot hold the tolerance the salesperson quoted, you have your answer before you sign anything.
What does a furniture CNC machine cost in Australia, and what is the ROI?
Capital costs vary widely by machine class and specification. The ranges below are indicative; actual pricing depends on configuration, automation options, and the Australian dollar at the time of purchase. Always request a formal quote.
Ranges are indicative only. Regional pricing, configuration, and currency movements affect final cost. Request a current quote from your supplier.
Running costs to budget for
-
Tooling and consumables: router bits, drill bits, and insert tooling are the largest ongoing cost. A production shop running MDF will replace nesting bits every 20–40 hours of cut time.
-
Vacuum pump maintenance: seals, oil, and filter changes on a rotary vane pump add up; budget a service every 500–1,000 hours.
-
Dust extraction: power consumption and filter replacement for a bag or cartridge system running 8 hours a day.
-
Spindle service: spindle bearing replacement is the most expensive single maintenance item; a well-maintained spindle typically runs 8,000–15,000 hours before rebuild.
-
Software licences: annual CAM software maintenance fees vary by package.
ROI considerations
Labour savings are usually the fastest payback driver. A nesting router that replaces two operators on a panel saw and router table pays for itself in labour alone within two to four years in many Australian shops, depending on award rates and shift patterns.
New product capability matters too. A 5-axis machine opens up chair frames, curved cabinet doors, and sculptural furniture that a shop simply cannot produce manually at competitive prices. That capability can shift a business from competing on price to competing on design.
CNC woodworking services that combine large-format routing with aerospace-grade process discipline demonstrate that tight tolerances and seamless fits are achievable in furniture components — a standard that raises the value of every piece leaving the shop.
Pro Tip: *Leasing a CNC machine preserves working capital and keeps your equipment on a predictable cost line. If you are unsure about volume, a 36-month finance arrangement lets you prove the ROI before committing to ownership.
How does a CNC furniture production workflow run from start to finish?
Getting the workflow right matters as much as choosing the right machine. A poorly organised workflow creates bottlenecks at the machine, errors in assembly, and wasted material even on a well-specified router.
Step-by-step production workflow
-
CAD model preparation. Draw or import part geometry. For panel furniture, this means cabinet carcass sides, shelves, doors, and drawer fronts as flat 2D profiles with all hardware hole locations marked. For 3D parts, a solid model is needed.
-
CAM and nesting. Import parts into your CAM package. The software nests parts on a virtual sheet, generates toolpaths, assigns feeds and speeds, and outputs a machine-ready file. Good nesting software also labels each part with a job number and position reference.
-
Labelling and job tracking. Print barcode or QR labels for each part before machining. Attach them as parts come off the machine. This single step eliminates most assembly errors in a busy shop.
-
Machine setup. Load the sheet, confirm vacuum hold-down across all zones, load the tool changer, and run a datum check. For a new material batch, run a test cut on a scrap piece first.
-
Machining. Execute the file. Monitor the first part of each job; check dimensions before running the full nest.
-
QA check. Measure critical dimensions on the first part off the machine. Check hole positions, profile accuracy, and edge quality.
-
Finishing and edging. Pass cut panels to the edgebander. CNC-cut panels have consistent dimensions, which means the edgebander can run without constant adjustment.
-
Hardware insertion and assembly. Dowel, confirmat, or cam-and-peg assembly follows. Consistent hole positions from the CNC mean assembly is predictable and fast.
Software used in furniture CAD/CAM
For flat panel furniture, dedicated cabinet CAD/CAM packages handle design and nesting in one environment. For 3D profiling and complex parts, general-purpose CAM packages are used to generate multi-axis toolpaths. The choice of software should be confirmed with your machine supplier before purchase — post-processor compatibility between the CAM package and the machine control is non-negotiable.
Pro Tip: Implement barcode or QR job tracking from day one, not as an afterthought. A label printer at the CNC station costs very little; the time saved hunting for misidentified parts in a busy assembly area pays for it in the first week.
What materials and tooling do you need for furniture CNC work?
Material behaviour drives tooling choice more than almost any other variable. Get this wrong and you will burn through bits, produce tear-out, and spend more time on sanding than on machining.
Material categories and machining behaviour
-
MDF: Dense and consistent, MDF machines cleanly but generates very fine respirable dust. It dulls tooling faster than solid timber. Use sharp, high-tooth-count spiral upcut or compression bits. Feeds can be aggressive; the material does not have grain direction to worry about.
-
Plywood: Alternating grain layers create tear-out risk on the face veneers, particularly on the exit side of a through-cut. Compression spiral bits (upcut/downcut combination) are the standard solution — they shear both faces cleanly. Feed rates need to account for glue lines, which are harder than the timber layers.
-
Hardwood (solid timber): Grain direction matters. Routing against the grain produces tear-out; routing with it produces a cleaner surface. Knots are harder than surrounding timber and can deflect a bit mid-cut. Use slower feed rates and sharper tooling than you would on sheet goods.
-
Softwood: Resinous species like pine can gum up tooling quickly. Keep feeds up to avoid dwelling in the cut, which causes burning. Sharp tooling and regular cleaning extend bit life significantly.
-
Composites and engineered panels: Melamine-faced board requires compression bits to avoid chipping the face. High-pressure laminate (HPL) is abrasive and dulls tooling fast; carbide or diamond-tipped tooling is worth the cost for production runs.
Tooling recommendations
Spiral upcut bits clear chips efficiently and suit deep pocketing. Compression bits suit through-cuts on veneered or melamine-faced panels. Straight bits are adequate for shallow profiling and light routing but generate more heat than spirals. For drilling, dedicated brad-point or Forstner-style CNC drill bits produce cleaner holes than repurposed router bits.
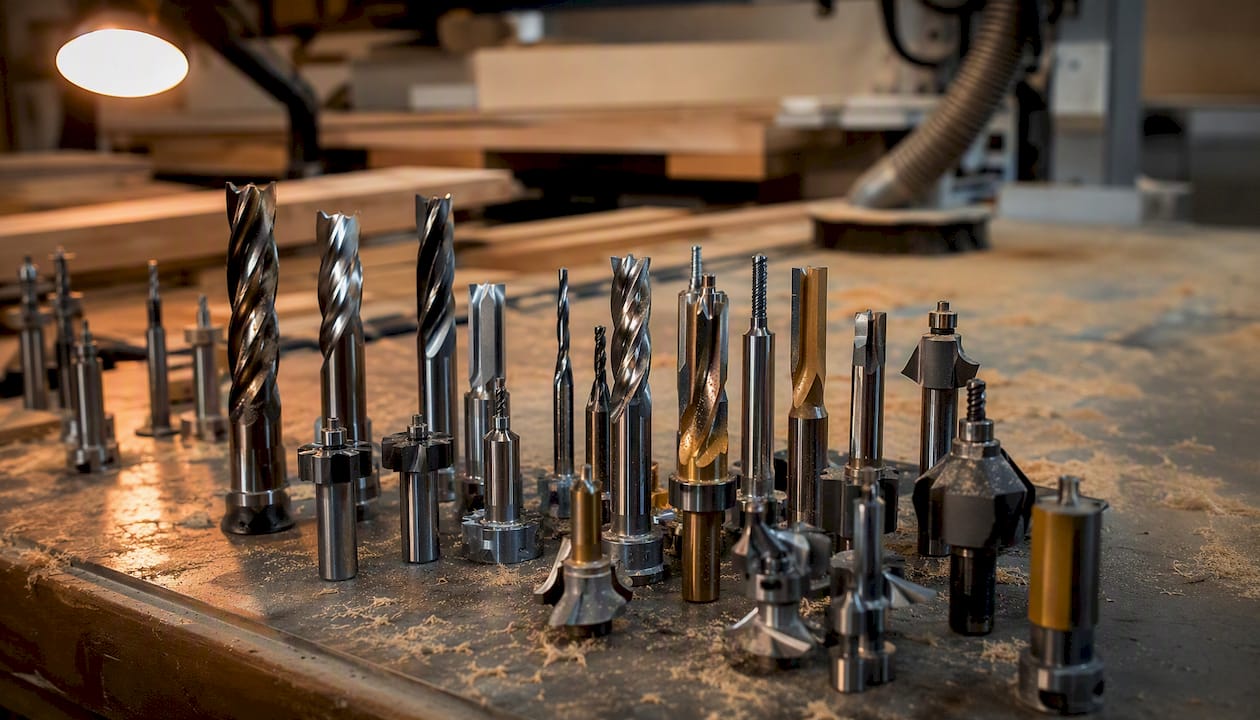
Coating matters for longevity. TiAlN-coated carbide bits last longer in abrasive materials like MDF and HPL. Uncoated carbide is fine for solid timber where the cut is clean and chip evacuation is good.
Practical routing guides recommend matching cutter geometry to material and operation — a point that experienced machinists know but new CNC operators often overlook when they reach for whatever bit is already in the changer.
Feeds and speeds are a starting point, not a fixed rule. A 12 mm compression spiral bit in 18 mm melamine MDF might start at 18,000 RPM and 6,000 mm/min feed, but machine rigidity, spindle condition, and material density all shift that number. Run a test, listen to the cut, and adjust.
Pro Tip: Track your tooling hours per bit type and material. A simple spreadsheet with bit type, material, hours run, and condition at replacement tells you exactly when to change bits before they start burning or tearing — which is always cheaper than running a dull bit to failure.
Carbide tooling for furniture routing typically runs 20–40 hours in MDF before quality degrades noticeably. In solid hardwood, that figure drops to 10–20 hours depending on species density and feed rates.
Maintenance, safety, and Australian compliance for CNC furniture shops
A CNC router is a production asset. Treat it like one.
Maintenance schedule
Daily:
-
Clear dust and chips from the machine bed, tool changer, and linear rails.
-
Check vacuum pump oil level and filter condition.
-
Inspect collet and tool holder for runout or damage before loading.
-
Verify dust extraction is drawing correctly before starting production.
Weekly:
-
Lubricate linear rails and ball screws per the manufacturer’s schedule.
-
Check drive belt tension and condition.
-
Inspect the tool changer carousel for wear or misalignment.
-
Clean spindle cooling vents and check for unusual noise or vibration.
Monthly:
-
Check spindle runout with a dial indicator.
-
Inspect all electrical connections and cable carriers for wear.
-
Service vacuum pump (oil change, filter replacement) per manufacturer interval.
-
Review and log any recurring alarms or faults with your service provider.
Safety and Australian compliance
Wood dust is the primary hazard in a CNC furniture shop. Respirable wood dust, particularly from MDF (which contains urea-formaldehyde resin), is classified as a hazardous substance under Australian workplace health and safety legislation. Safe Work Australia sets workplace exposure standards for wood dust, and compliance requires local exhaust ventilation (LEV) at the machine, not just a general extraction system in the room.
PPE requirements for CNC routing include:
-
P2 respirator when working near the machine or handling freshly cut MDF.
-
Safety glasses during tool changes and machine setup.
-
Hearing protection if the machine is running in an enclosed space without acoustic treatment.
Workshop layout should keep machine access and egress clear at all times. The area around the machine bed needs enough clearance to load and unload full sheets safely, which typically means 1.5–2 metres on the loading side and 1 metre on the other three sides.
For electrical compliance, CNC machines must be installed by a licensed electrician and comply with AS/NZS 3000 (the Australian Wiring Rules). Any machine imported without Australian electrical certification needs to be assessed before connection.
Pro Tip: Negotiate a service agreement that includes at least one annual preventive maintenance visit from a local technician. Stocking a small kit of critical spare parts — vacuum pump seals, drive belts, a spare collet set, and fuses — means a minor fault does not become a week-long production shutdown.
Why is automation and batch-size-one production reshaping furniture manufacturing?
The furniture industry is in the middle of a structural shift. Consumers want personalised products; retailers want shorter lead times; manufacturers are caught between both pressures. The answer, increasingly, is automation combined with batch-size-one capability.
Transitioning to batch-size-one production can significantly increase competitiveness for furniture manufacturers by enabling mass customisation without expensive retooling. That is not a theoretical benefit. A nesting router with barcode job call-up can switch between a custom kitchen cabinet and a standard bookcase shelf between sheets, with no manual changeover. The machine does not care about batch size; the CAM software handles the variety.
Robots and automated material handling are already standard in high-volume furniture factories. Yaskawa’s Motoman robots, for example, are deployed across cutting, drilling, gluing, and painting in furniture production lines, raising throughput and consistency where volume justifies the investment. For Australian manufacturers not yet at that scale, the more immediate opportunity is integrating a nesting router with a six-side drilling centre and a barcode-driven job management system.
The practical implication for an Australian furniture manufacturer moving toward a smart production cell is this: the machine investment is only part of the equation. The CAM software, the job management system, and the operator training are what determine whether the automation actually delivers. A nesting router running manual job setup is faster than a panel saw, but a nesting router running barcode-driven job call-up with automated nesting is a different class of operation entirely.
Anderson’s panel processing and multi-axis equipment is built for exactly this kind of integrated production environment, where furniture manufacturers need machines that talk to their software and scale with their volume.
How long does it take to integrate CNC machining into a furniture workflow in Australia?
The honest answer: faster than most shops expect, slower than most vendors suggest. A realistic timeline for a small-to-medium Australian furniture manufacturer looks like this.
Weeks 1–2: Procurement and site preparation. Finalise the machine specification, sign the purchase agreement, and begin site preparation. This includes confirming the electrical supply (three-phase power is standard for production routers), installing dust extraction infrastructure, and clearing floor space. If a concrete pad or machine anchoring is required, allow extra time.
Weeks 3–8: Delivery and installation. Lead times for CNC machines vary. Machines in local stock can arrive in two to four weeks; imported machines with custom configurations can take eight to sixteen weeks or longer. Confirm lead time before signing. Installation and commissioning by the supplier’s technician typically takes two to five days.
Weeks 8–10: Operator training. Most suppliers provide two to five days of on-site training covering machine operation, basic maintenance, and CAM software setup. That is enough to get production running; it is not enough to get the most out of the machine. Plan for an additional two to four weeks of supervised production before operators are fully confident.
Weeks 10–16: Workflow integration. This is where the real work happens. Integrating the CNC into your existing production flow — connecting it to your CAM software, setting up job tracking, adjusting your edgebanding and assembly sequence — takes time and iteration. Most shops find their workflow stabilises after six to eight weeks of production.
Months 4–6: Full production capacity. By this point, a well-supported installation is running at or near its designed throughput. Tooling choices have been refined, feeds and speeds are dialled in, and the operators know the machine’s quirks.
The total elapsed time from purchase decision to full production capacity is typically four to six months for a straightforward installation. Complex installations with automation, custom tooling, or integration into an existing factory management system can take longer. Budget for it.
The case for moving sooner rather than later
The furniture manufacturers who adopted CNC early did not do so because the technology was perfect. They did it because the alternative — competing on hand labour against factories with automated production — was not a viable long-term position.
The same logic applies now, but the stakes are higher. Australian furniture makers are competing with imported flat-pack product, rising labour costs, and customers who expect both customisation and short lead times. A nesting router with good CAM software addresses all three pressures simultaneously: it reduces labour per part, enables batch-size-one production, and produces consistent quality that hand methods cannot match at scale.
My recommendation: start with the machine class that covers your current part mix, not the one that covers your aspirational part mix. Add a 5-axis capability or a six-side drilling centre when your volume and part complexity justify it. Get the CAM software and job tracking right from the start — that is where the real productivity gain lives, not in the machine spec alone.
Request a demo on your own parts. Measure the output. Ask hard questions about local service. Then decide.
Anderson Group Australia: CNC equipment and support for furniture manufacturers
Anderson Group Australia supplies CNC machinery, servicing and spare parts. Confirm the exact machine configuration, installation arrangements and available support with the team.
For panel furniture and cabinet production, the Genesis PLUS nesting router handles sheet goods with the bed size, vacuum hold-down, and CAM integration that production shops need. For complex non-ferrous or composite furniture components, assess the AXXIOM 5-axis series and MASS-5 large-scale machining centre against the drawings, required axis access and documented material applications rather than assuming that every 5-axis model suits curved timber work.
Confirm the installation, training, parts and service arrangements for the chosen machine. Any preventive-maintenance plan or response-time commitment should be agreed explicitly.
The next step is straightforward: contact Anderson to request a spec sheet for the machine class that fits your production needs, or arrange a demo using your own parts and materials. Visit Andersonaustralia to start the conversation.
Sources
The following resources were used in preparing this guide and are worth bookmarking for deeper technical detail.
-
Robotics and automation in wood products and furniture manufacturing — BDC
-
Elasn CNC double‑station six‑sided drilling & milling centre — ELASN Woodworking